
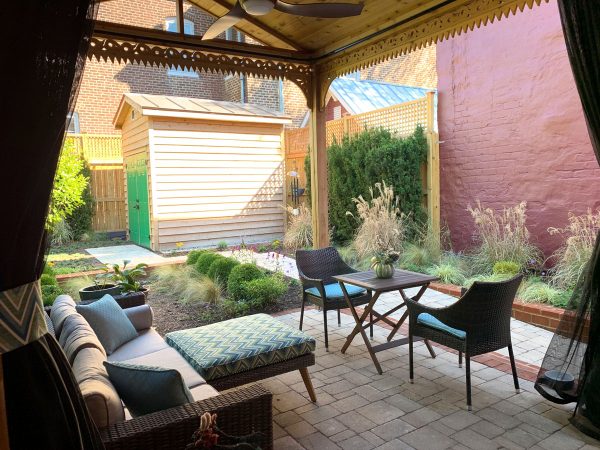
Building an outdoor living space for a historic home isn’t always straightforward. In Part One, I showed where this garden ended up: a screened pergola, French doors from the kitchen, and a garden the homeowners use as a room of the house. This post covers how we built it. Every decision on this site depended on another.
Planning an Outdoor Living Space for a Historic Home
The lot is twenty-eight feet wide and one hundred and fifty feet long, and that length includes the house. Overgrown plants crowded the yard. The barn-style shed was too small for a house with no attic or crawlspace storage, which is common in old city houses. A raised masonry curb projected into the path to the shed, so every trip meant stepping up and over it in both directions.


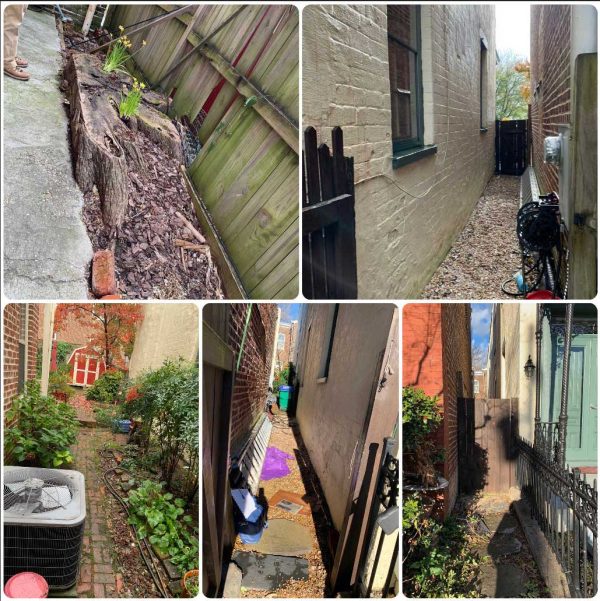
Stumps, Roots and 27 Inches
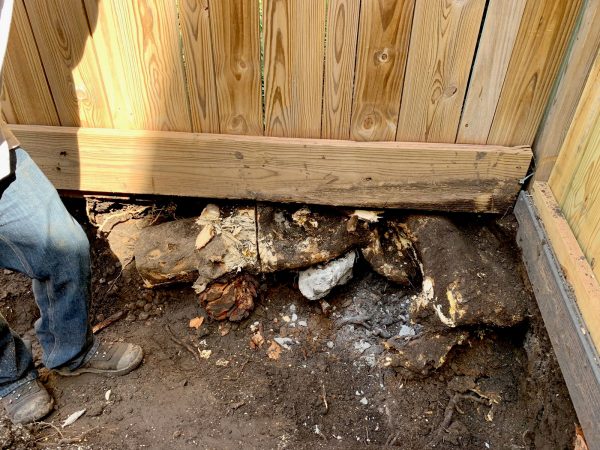
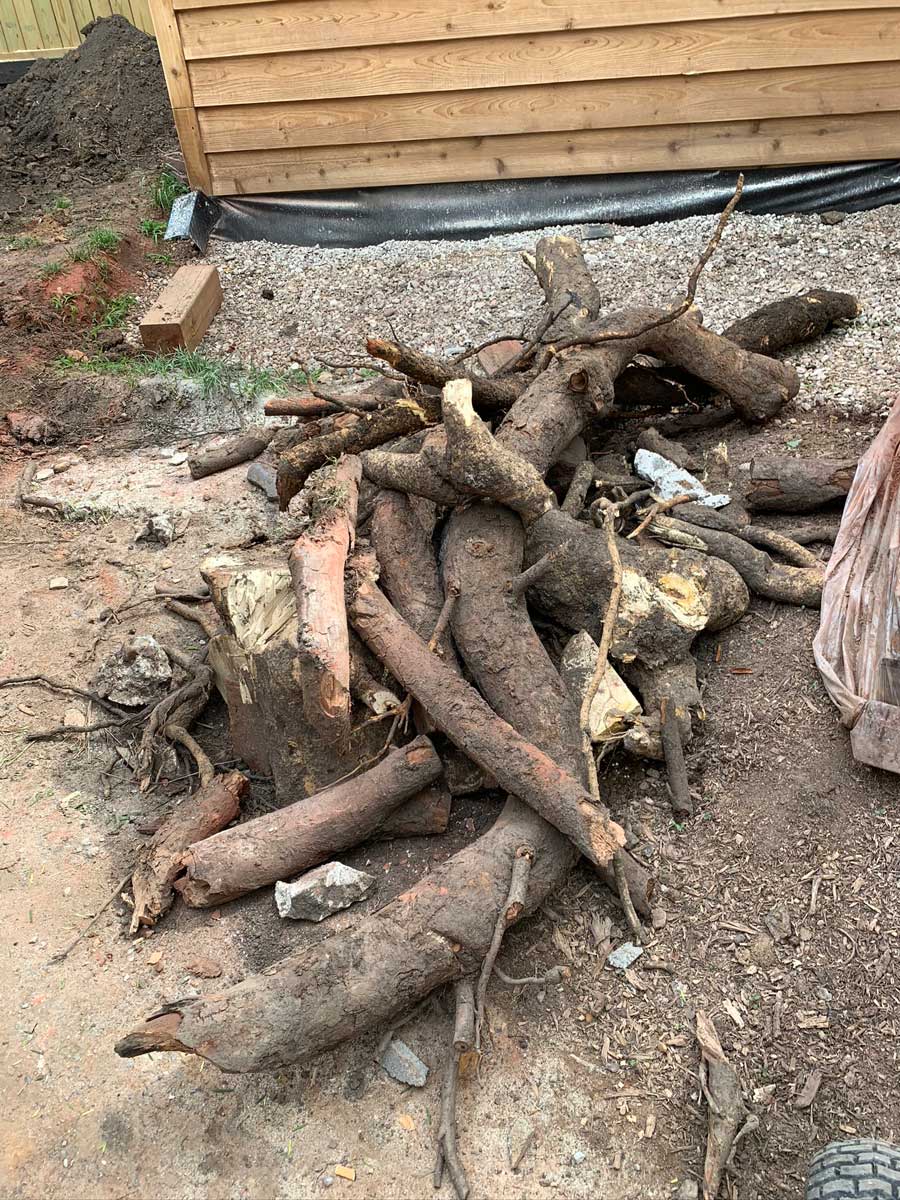
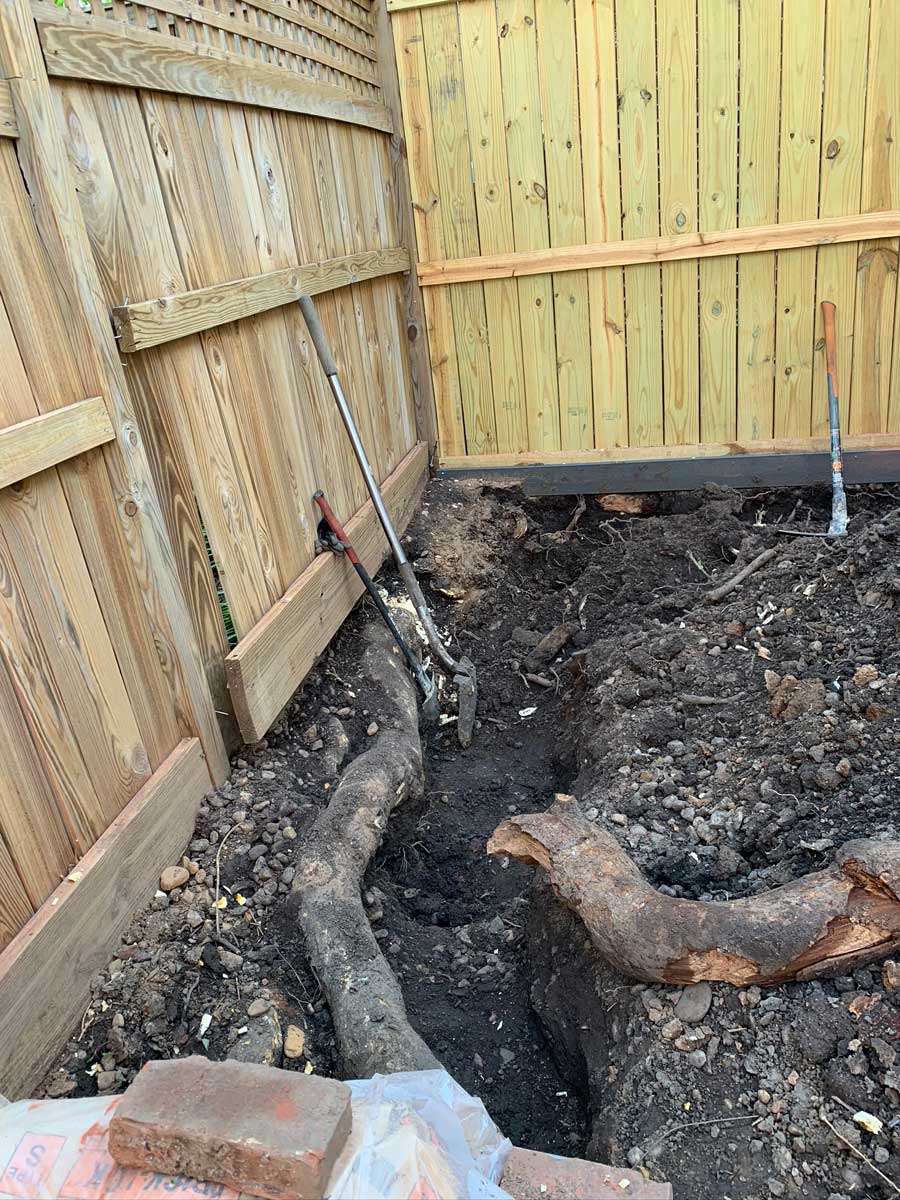
Two neighbours had removed large trees the year before, so we began with stump grinding. When we graded for the new fence, we uncovered roots from those trees, many thicker than my thigh, and cut out every one.
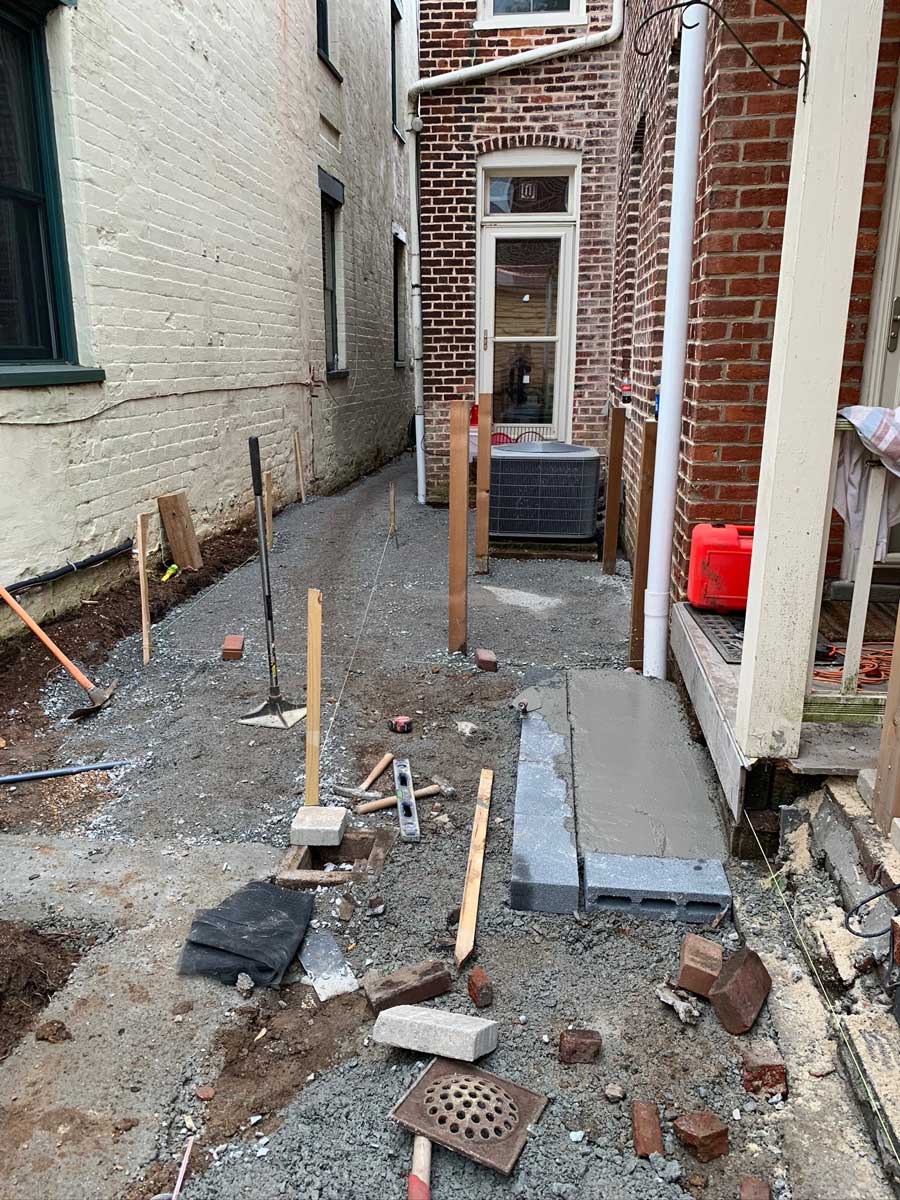
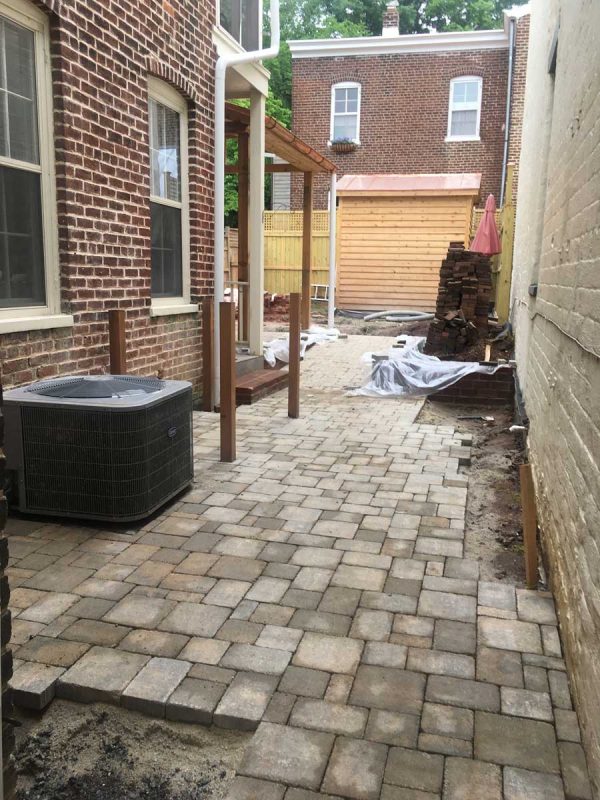
Everything we built reached the backyard through a 27-inch passage between the house and the property line, the only route from the street. No large machinery could get in. The shed, the pergola, the copper, the brick, the soil and every plant came through that gap by hand. On a site like this I depend on contractors who work hard and solve problems creatively, and these crews did both.
Building the Structures
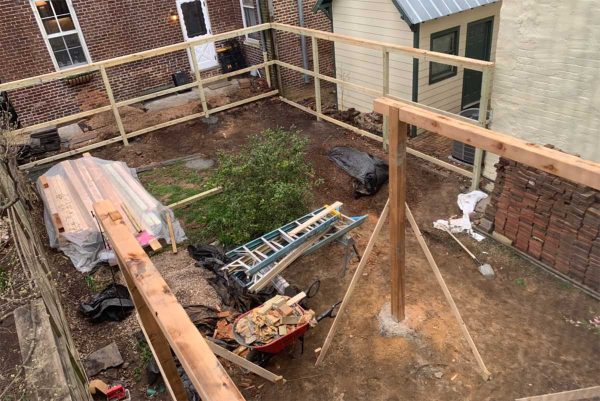
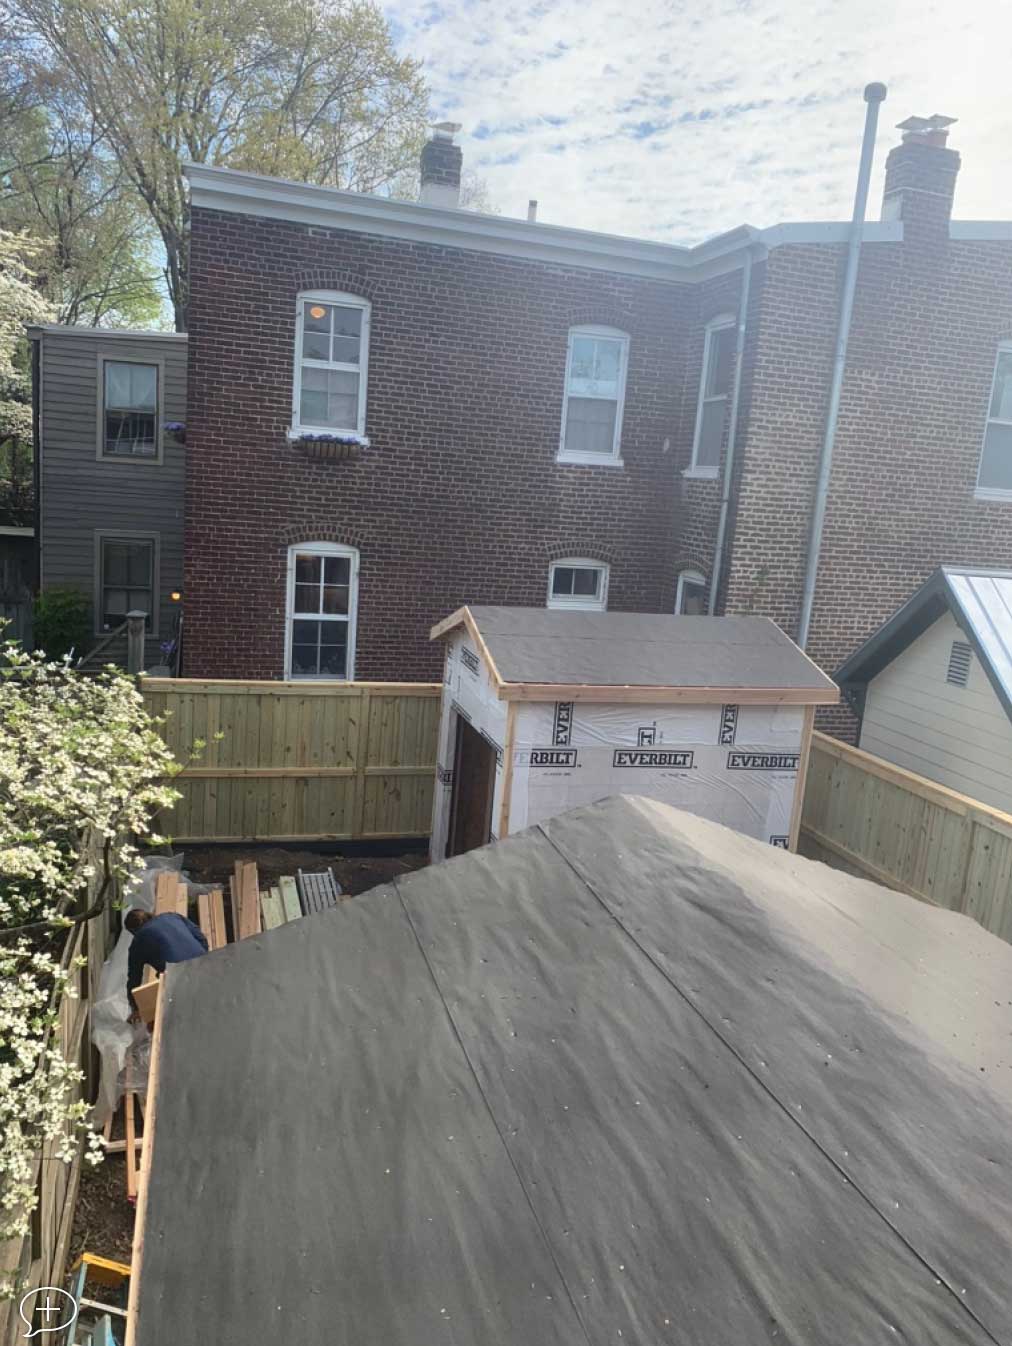
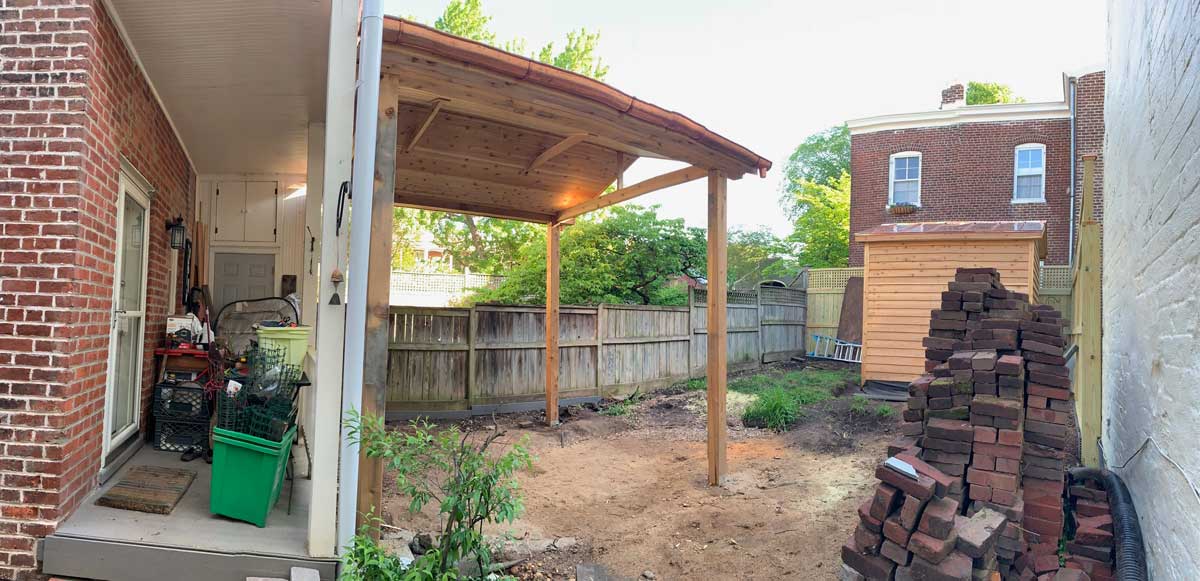
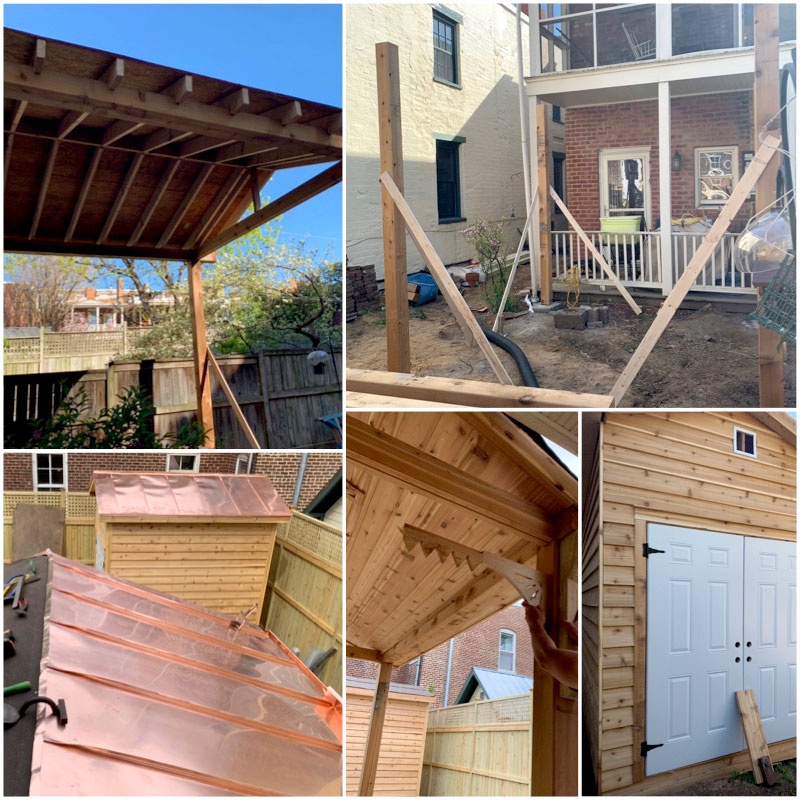
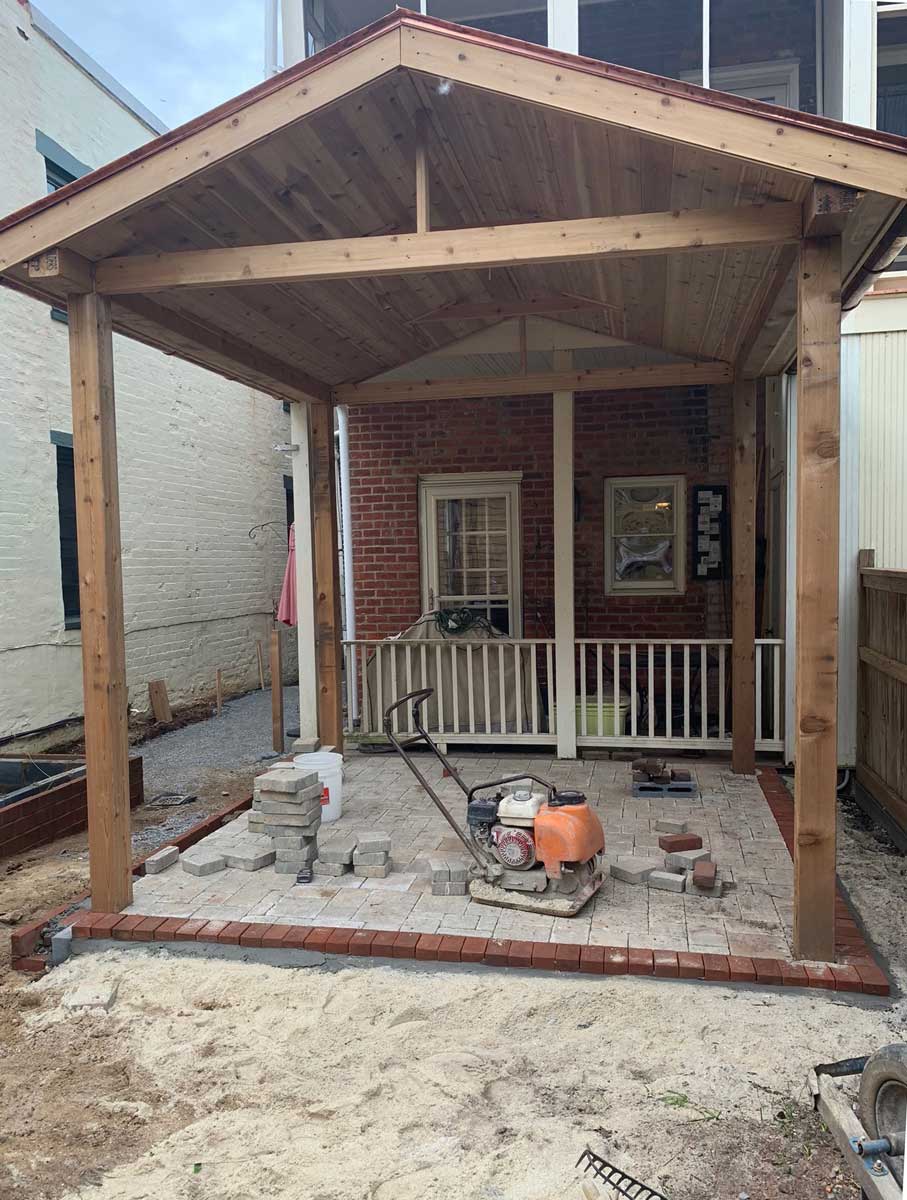
We framed the fence at the same time as the pergola. We simplified the porch scrollwork slightly for the new structure, and the carpenter hand-cut every piece. If anyone knows who designed the original 1889 scrollwork on this porch, I would love to hear from you.
 ,
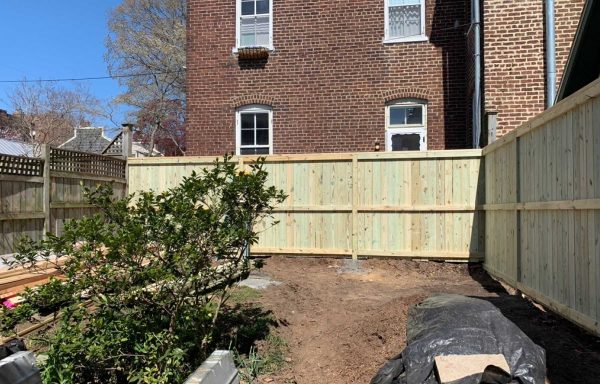
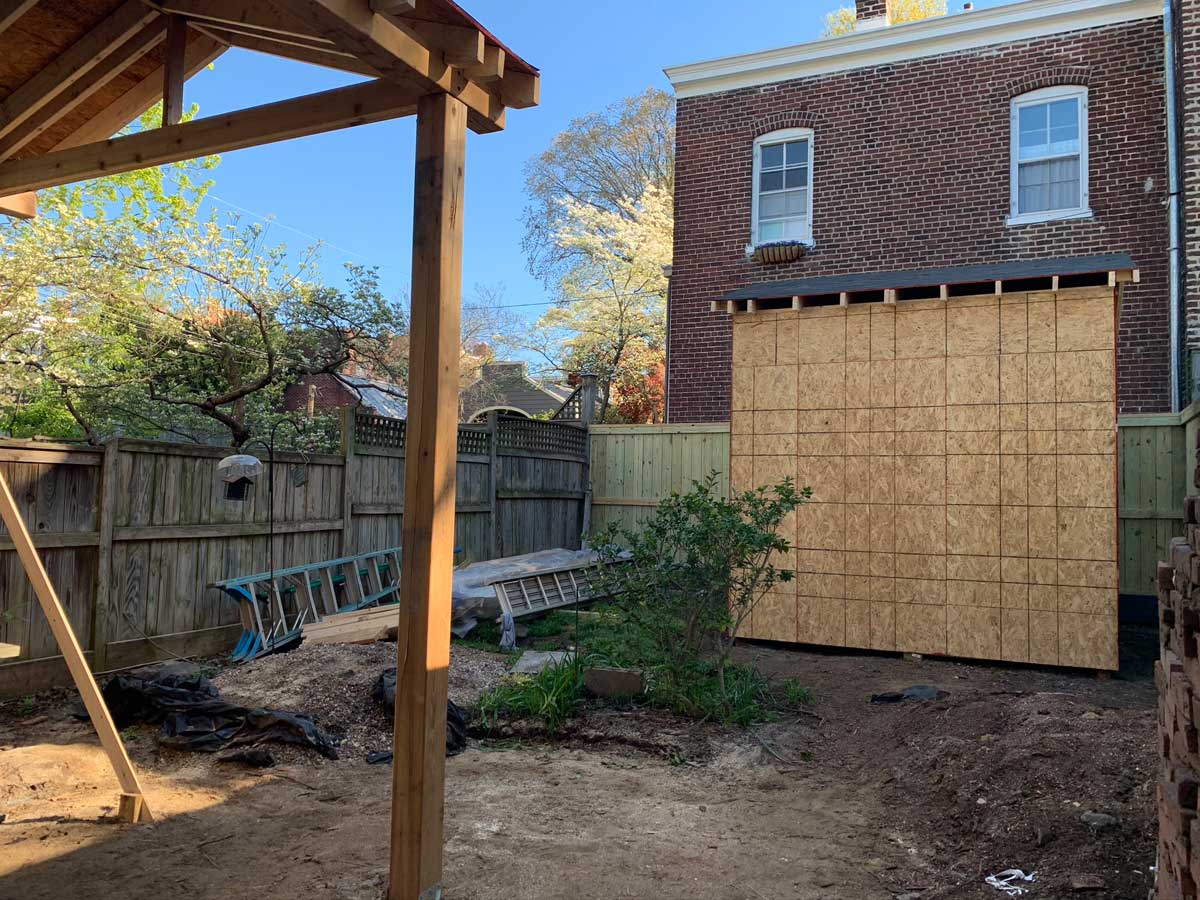
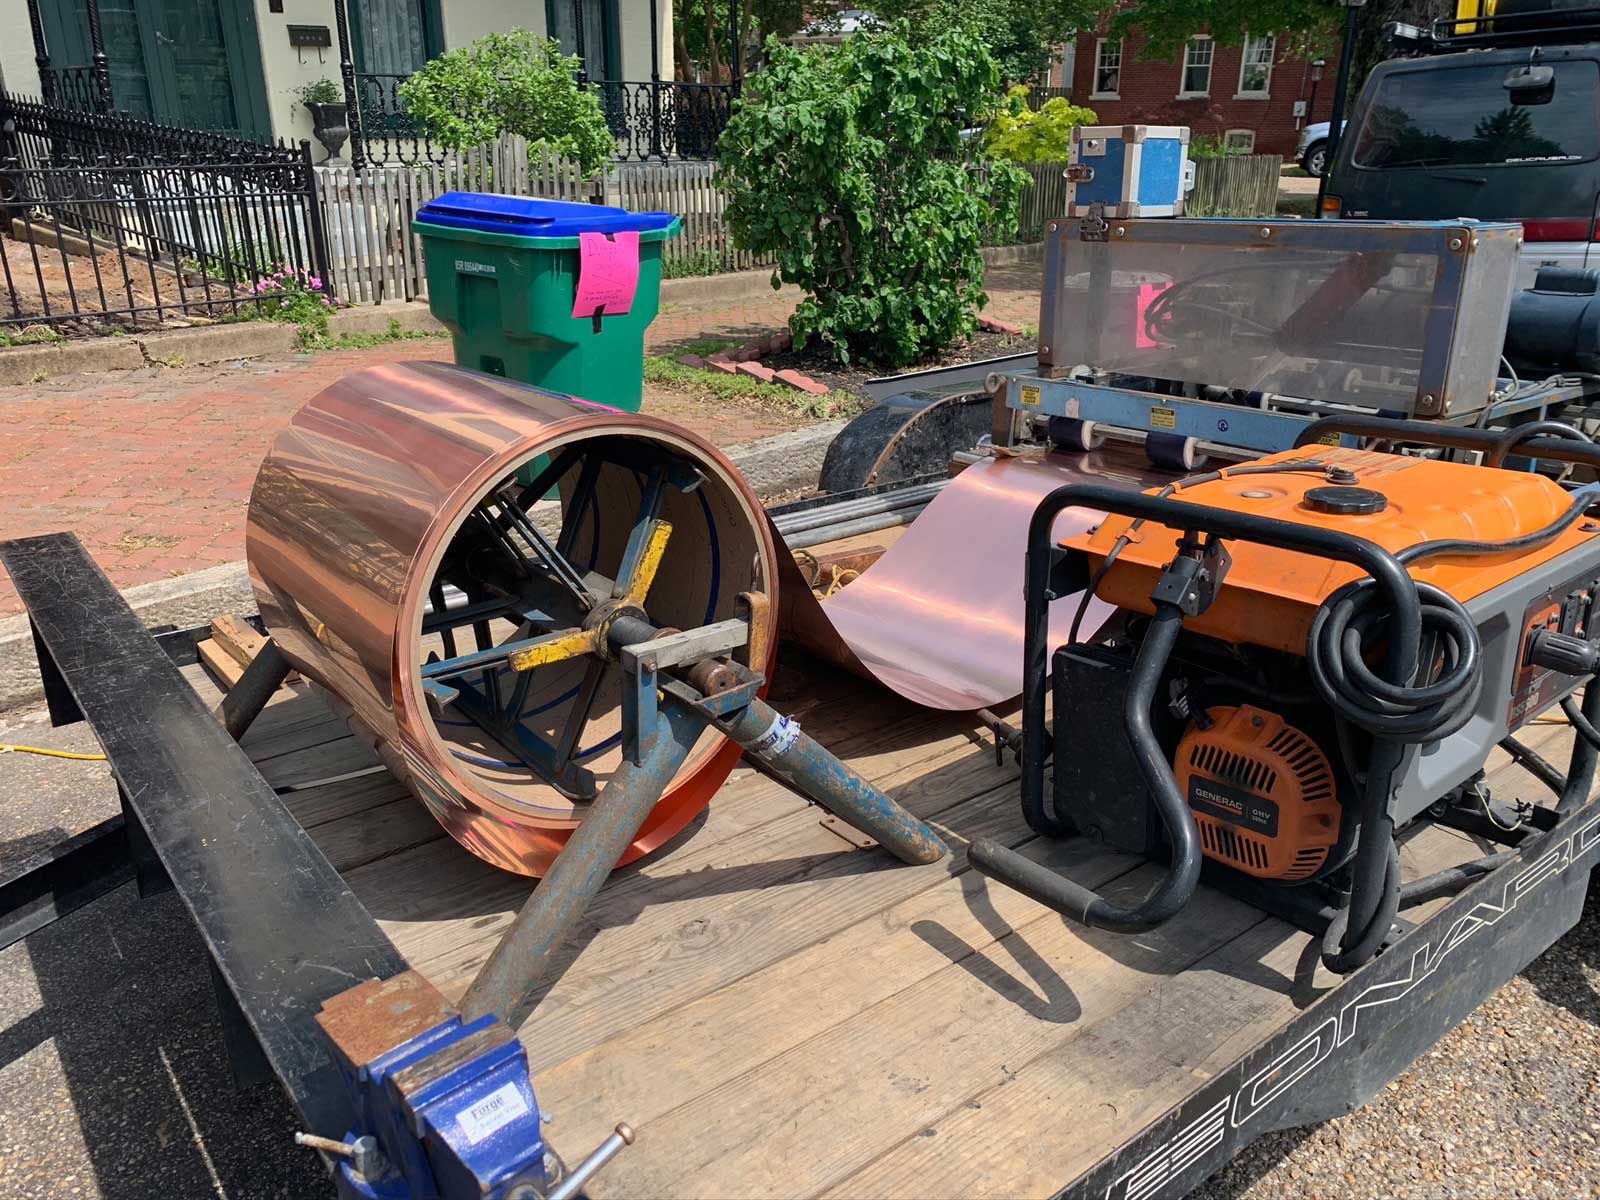
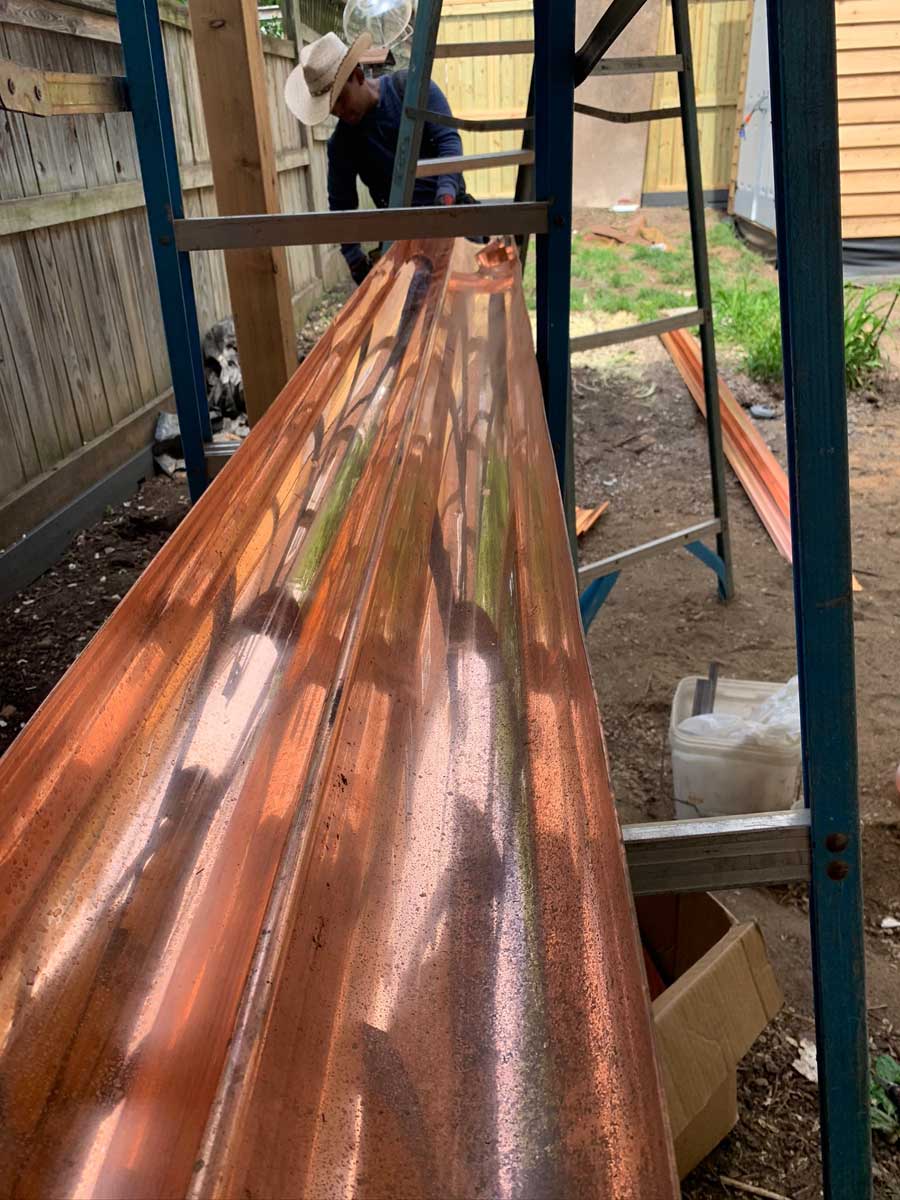
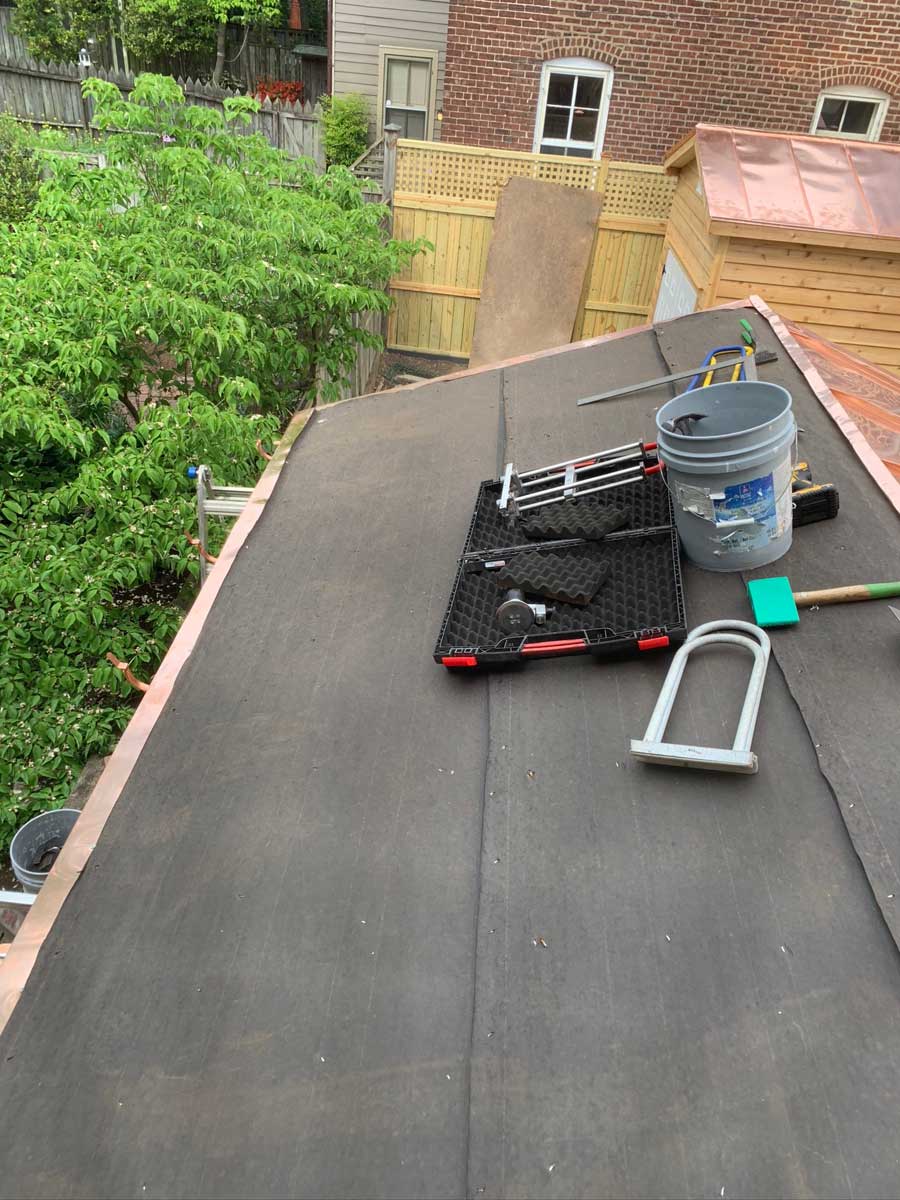
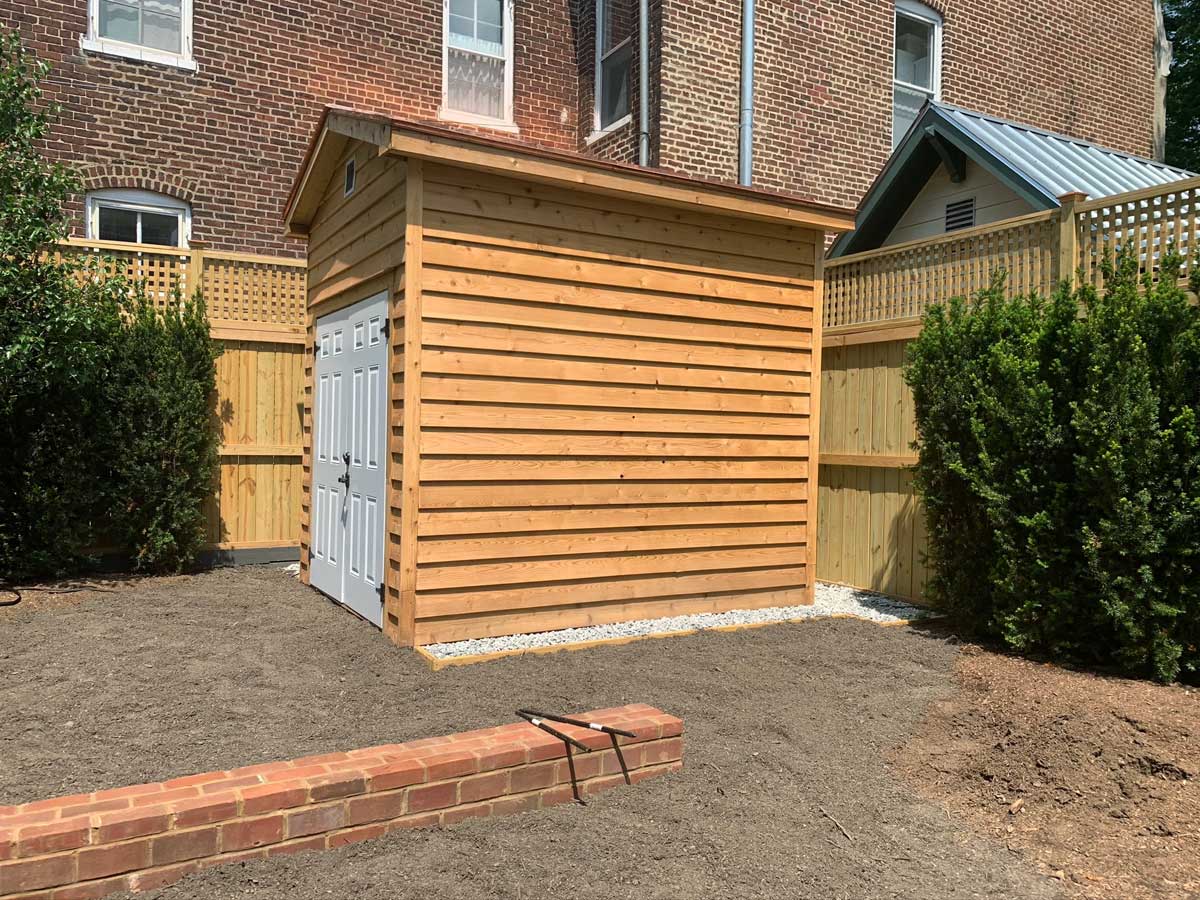
The custom shed went up next. Its 9-foot walls give the homeowners far more storage than the old shed did, which a house without attic or crawlspace storage badly needed. I specified cedar for both the pergola and the shed because it resists rot and insects and holds up to years of Richmond weather. The roofers formed and cut all of the standing-seam copper on site.
We also added a header to both the first- and second-floor balconies, which let us remove several posts the homeowners had been looking around to see the garden.
We stacked the old brick from the yard to reuse on the front walk. Part Three tells that story.
The Drain That Explained Every Wet Spring
The homeowners had lived with drainage problems for years, and I wanted them solved before the hardscapers arrived. When we dug up the existing drain, the cause was obvious.
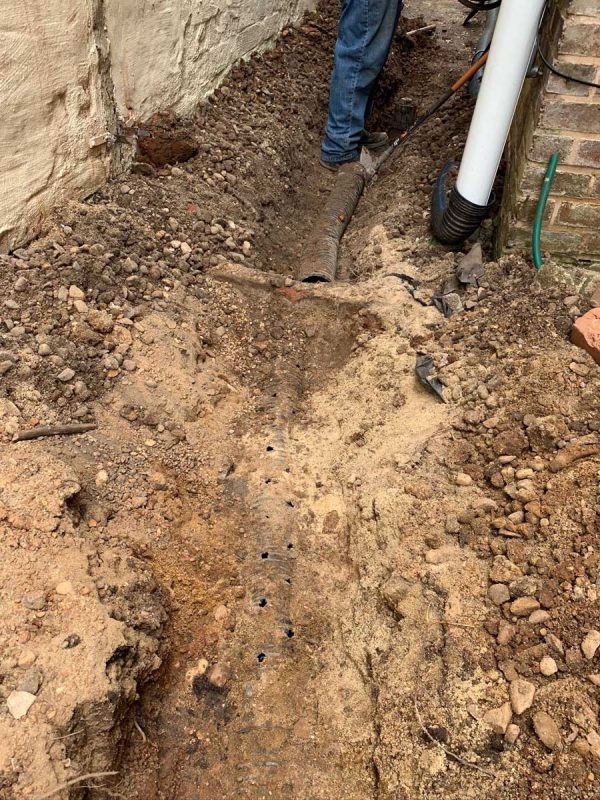
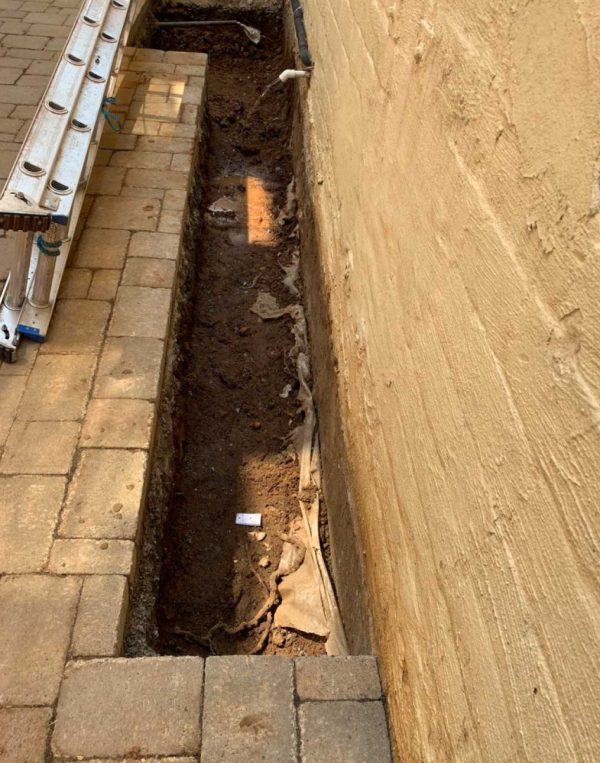
Whoever installed it had used flexible corrugated drain line. That pipe crushes and clogs, and in my experience it fails, often within ten years. This installation made it worse. The pipe had no gravel bed and no filter fabric to keep out soil and sediment. The photo can’t show the slope: halfway along its run, instead of falling gently to its outlet, the line sloped down, then up, then down again. Water had nowhere to go.
I’ve dug up enough failed drains to be firm about this. A French drain needs rigid pipe, a gravel surround, filter fabric wrapped around the whole assembly, and a steady fall from start to finish. We installed a new drainage system built that way before a single brick went down.
Three Grades Instead of One
I divided the yard into three levels rather than forcing it flat.
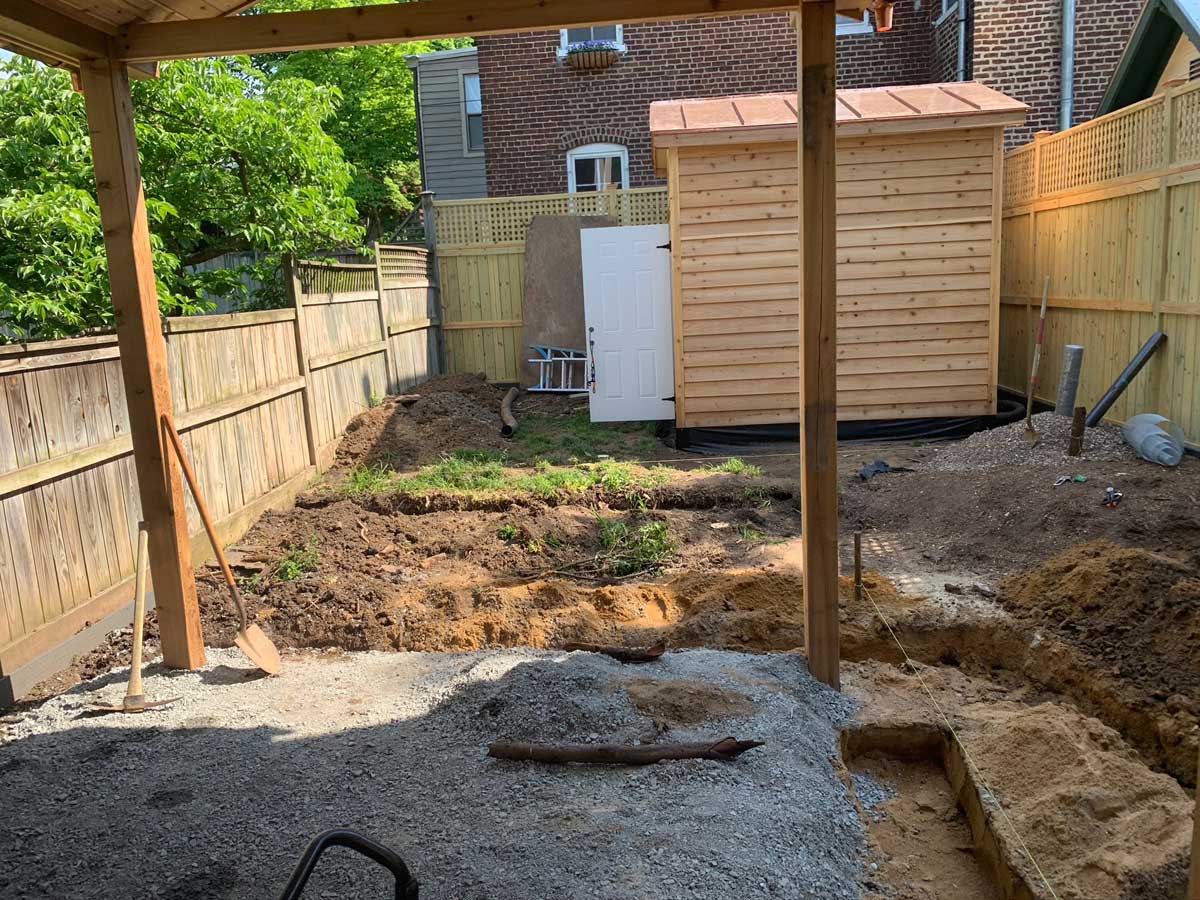
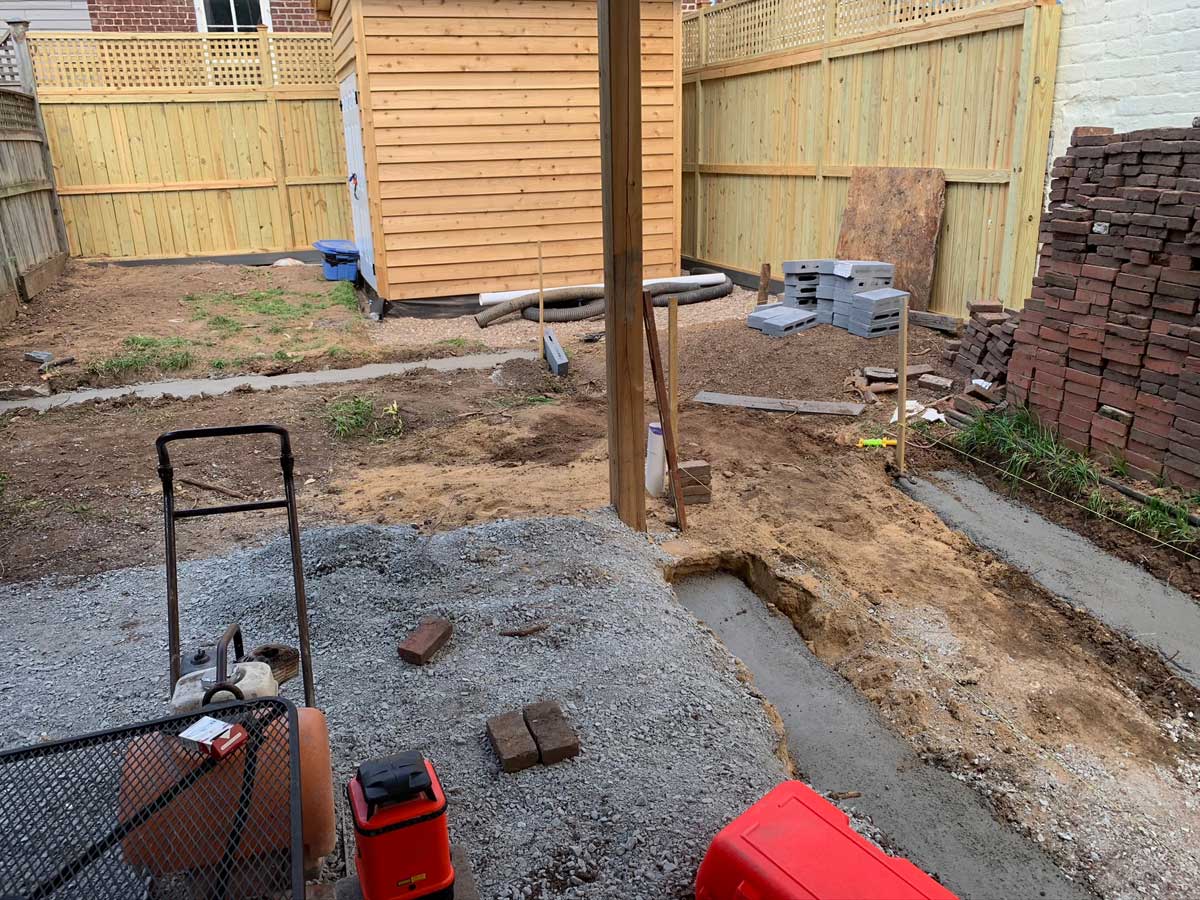
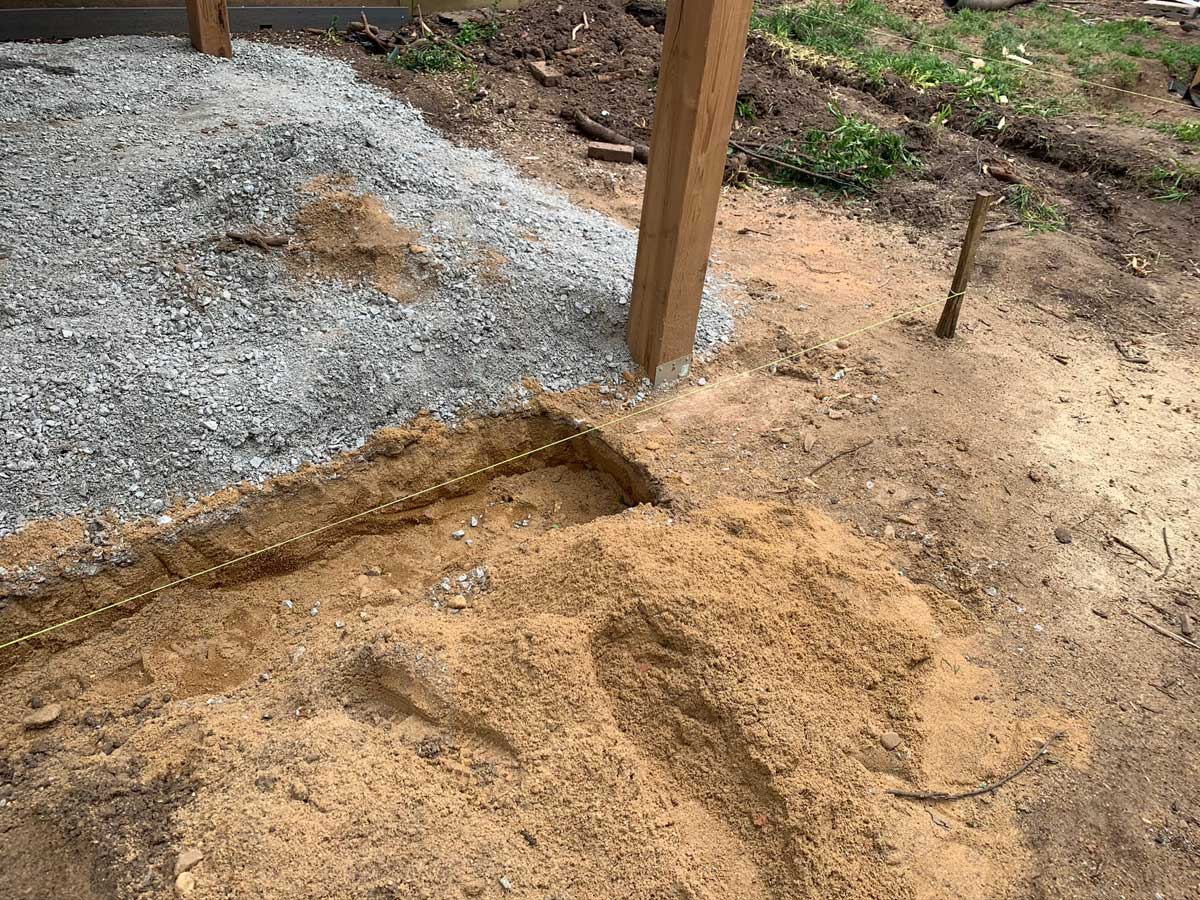
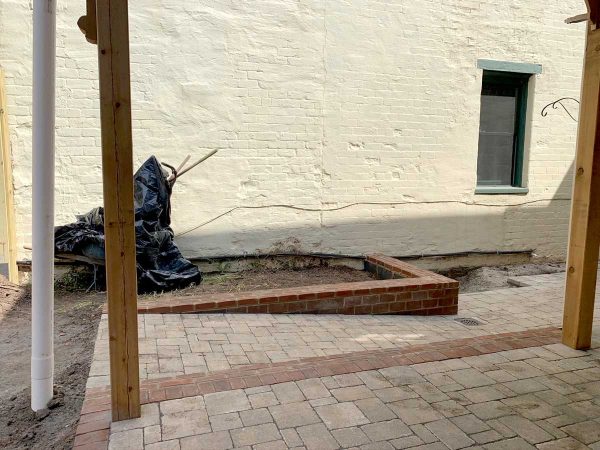
We set the patio beneath the covered pergola at the height of the existing back porch, so the house and the new outdoor room meet at the same level. From there, the garden rises about 18 inches to the upper level, where the new shed sits. A low brick retaining wall holds that upper garden in place.
I designed the shed entrance on grade, with no step at the door. The homeowners use the shed for equipment and larger items, and they needed to roll things directly in and out.
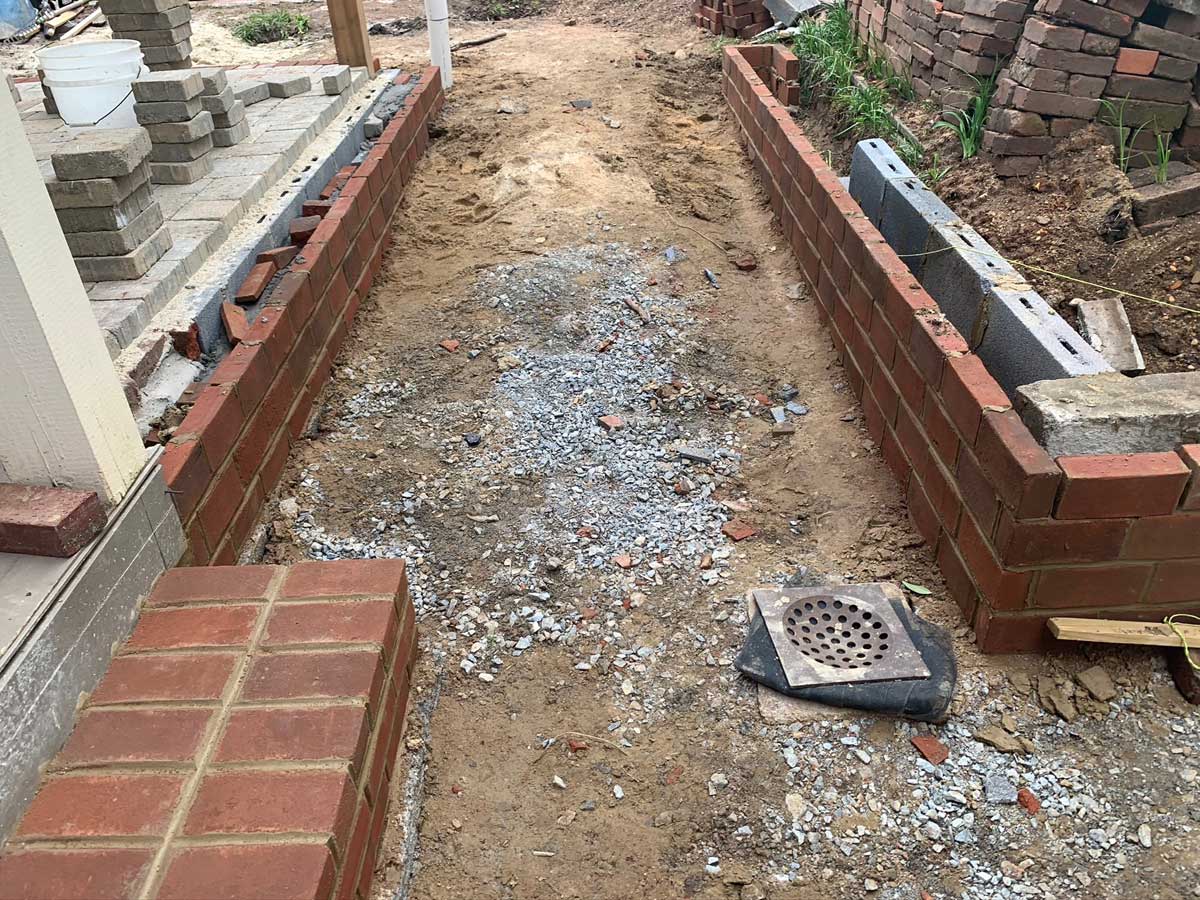
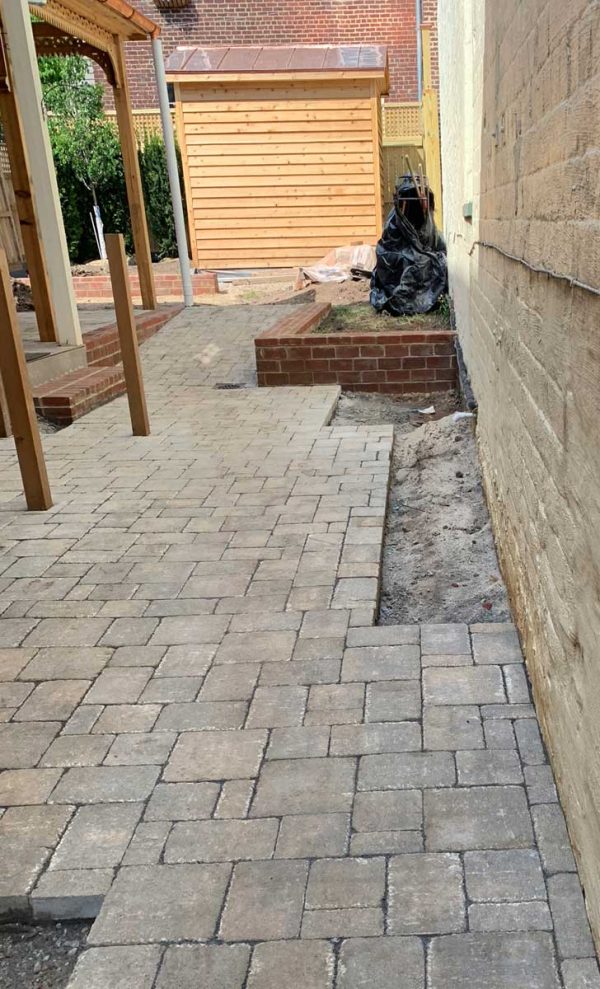
The property drops again through the side courtyard, where the bottom of the ramp sits about 15 inches below the patio. Brick ties all three levels together: the retaining wall, the patio, the walkways and the ramp are all brick, so the grade changes organize the garden without breaking it into separate pieces.
Why a Ramp Beat Steps
The curb on the old route had frustrated the homeowners for years, and they move equipment in and out of the shed on a dolly. Stairs would have worked, but they would have been a daily irritant. The homeowners and I chose a ramp, which gives them continuous wheeled access from the side courtyard up to the shed. We set the shed entrance on grade so they could move directly in and out without a step.
I think about ramps personally. I was hit by a car as a pedestrian, and for a quite a long time I got around with a walker and a cane. Suddenly every step decided where I could and couldn’t go. Nobody plans for that, and you never know who will live in a house next, or what they’ll need. A future owner using a walker, a cane or a wheelchair can move through this garden, and ramps are easier and safer than stairs for people and dogs alike. Designing for aging in place costs very little at the planning stage and a great deal as a retrofit.
Squaring a Garden to a House
The neighbouring house isn’t parallel to this one, a common condition with houses over a hundred years old. If we had followed the neighbour’s wall, every bed and brick edge would have looked crooked against the Victorian. We laid out the geometry of the beds, brick edges and paths from the house itself and absorbed the difference along the property line.
 ,
What the Soil Jar Test Showed
Before planting, I tested soil from several parts of the yard. You put a soil sample in a clear jar with water and a few drops of dish soap, shake it, and let it settle. The soap helps the particles separate, and over the next day the layers show how much sand, silt and clay the soil holds and how much organic matter floats on top.

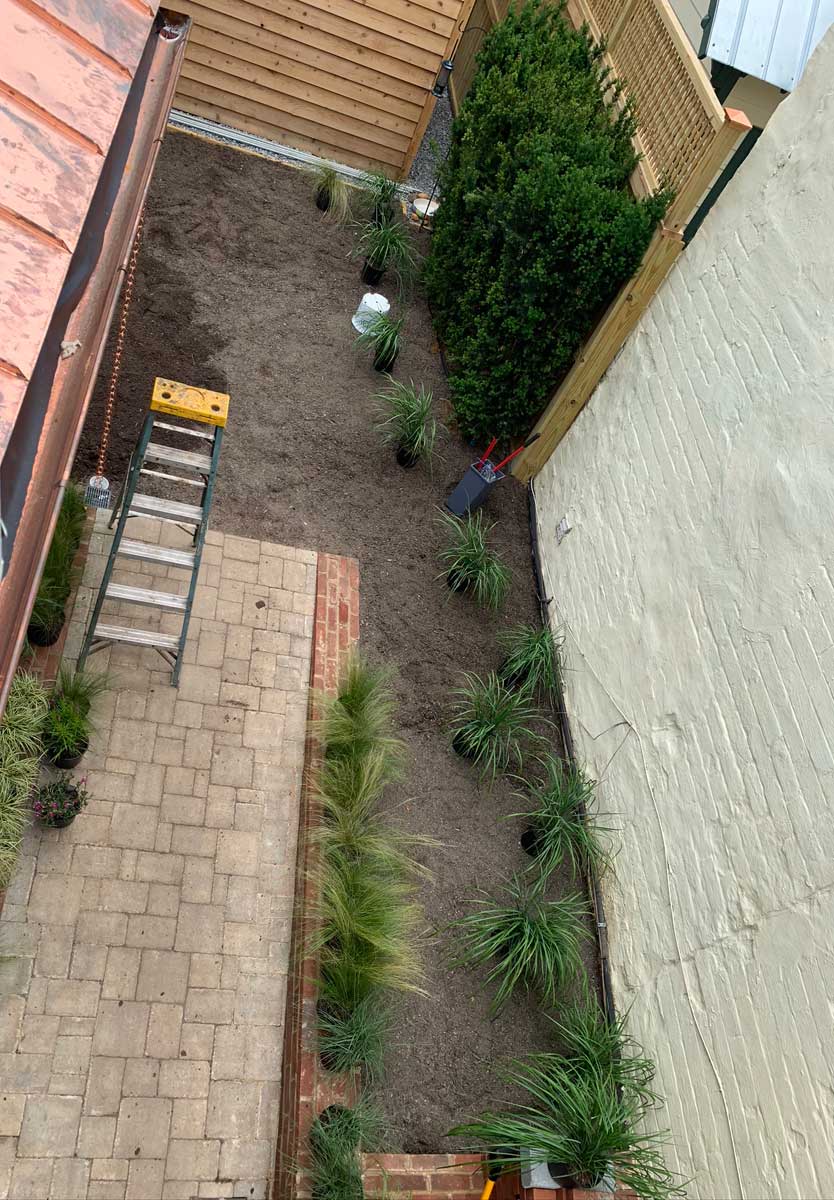
The jar on the left had the clearest water and the least organic matter, the middle jar had the most, and the third fell between them. None had much. The yard was mostly sand, which drains well but holds almost no moisture or nutrients. So we dug out about 18 inches from every bed and refilled them with the 50/50 blend of soil and compost I specified, then mulched heavily. The compost holds water and nutrients where roots can reach them. The mulch protects the soil, moderates its temperature, slows evaporation and suppresses weeds.
I planned the garden to be drought tolerant from the start. Summers are running hotter, dry periods are lasting longer, and a garden that depends on constant watering hands its owners a permanent chore. Rebuilt soil, heavy mulch and plants suited to the conditions work together, so the garden needs less water and less maintenance as it establishes.
Trees, Yews and the Rest of the Planting
We removed several mature trees that had outgrown the lot and replaced them with three smaller flowering trees that will reach full size without overwhelming the garden. The first had a huge root ball, and the tree dolly wouldn’t fit through the gate, so we moved it with a regular dolly and three people. Always start with the hardest item.
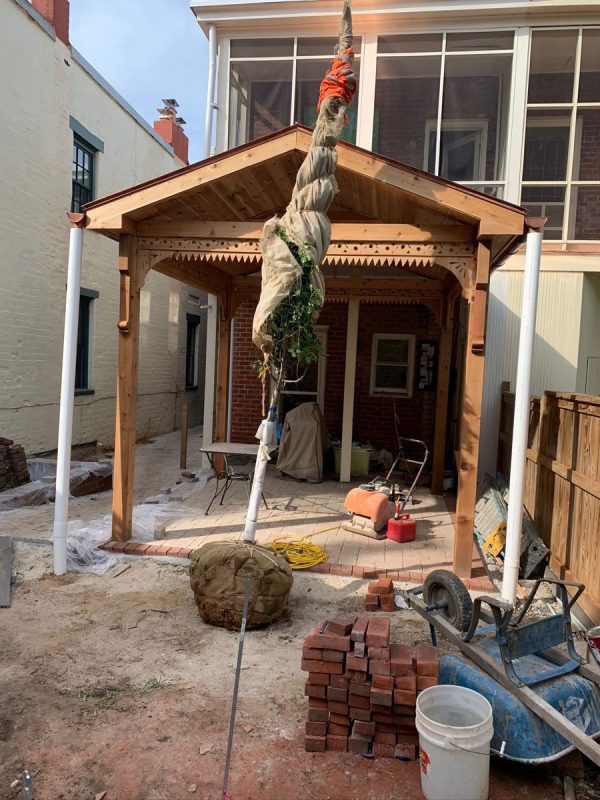
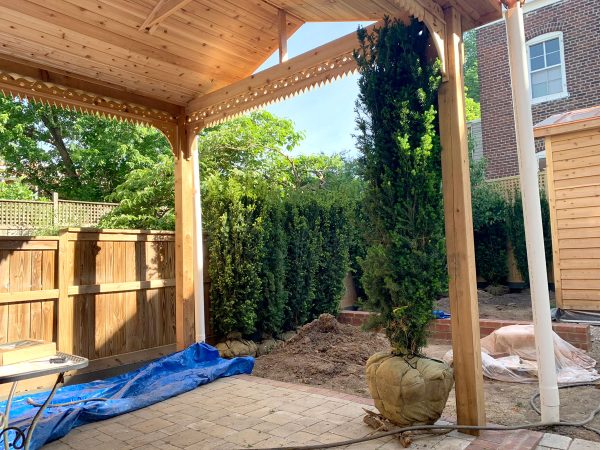
I couldn’t find yews in Virginia at the size and maturity I wanted, so I sourced them from a grower in Oregon. The grower estimated 160 pounds each; my planter put them closer to 300. Every one came through the 27-inch passage. Mature stock costs more to buy and to ship, and it gave the homeowners full privacy on day one instead of years of waiting.
 ,
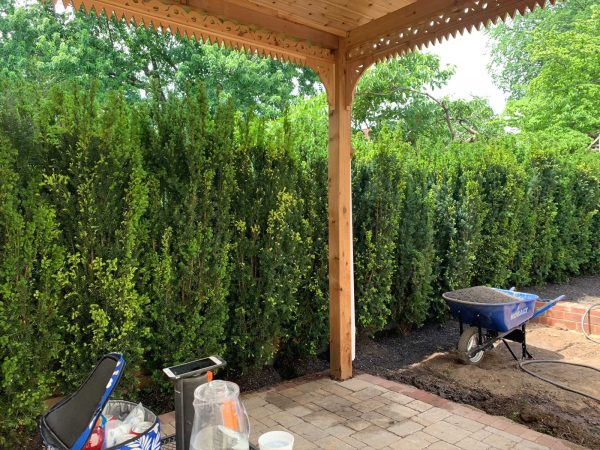
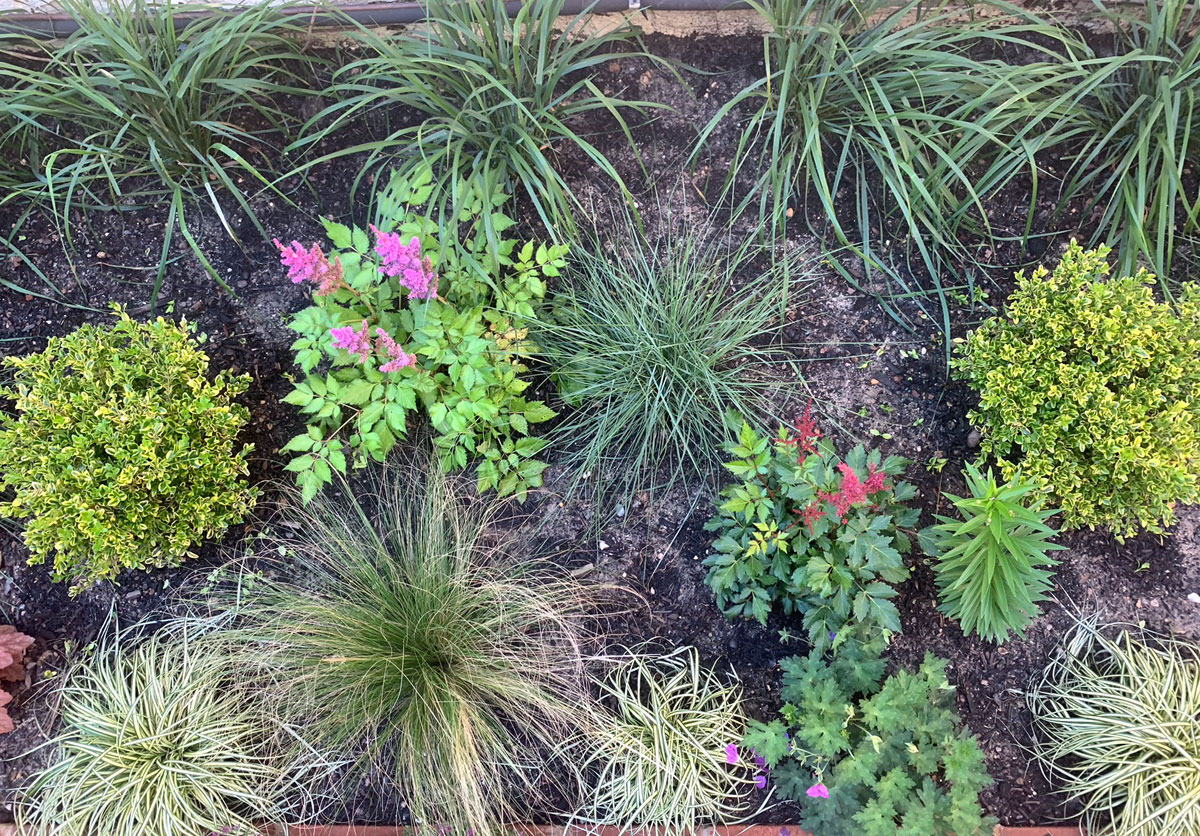
We kept two existing hydrangeas, and around it planted grasses, cranesbill geranium, liatris and yarrow for summer bloom, pollinators, birds, scent and colour against the brick.
Groundhogs had been a problem on the property, so we installed metal mesh under the new shed to keep them from denning beneath it, and under the gravel areas as well.





The Finished Garden
While the neighbours painted their house, the cushions and mosquito curtains were made and hemmed. Then the homeowners moved outside.
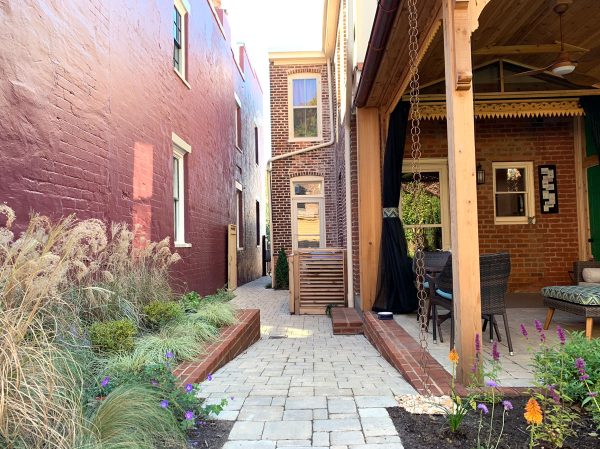
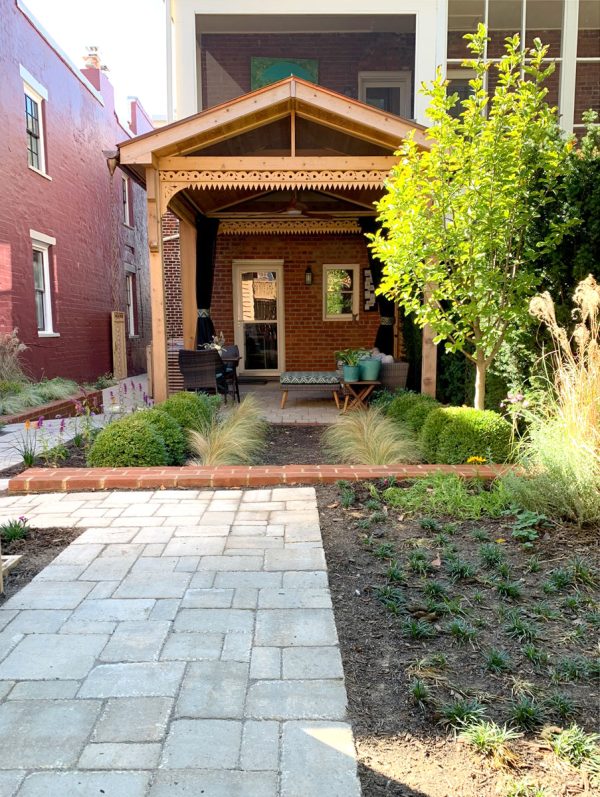
They now step from the house onto the patio and into a screened room under copper, with the yews closing out the neighbours and the trees filling the view. From both balconies, the garden opens up without a row of posts in the way. The bins roll to the curb on brick instead of pea gravel, the ramp carries the dolly up to the shed, and the shed opens at ground level. The ladder hangs on the wall and the new hose reel reaches where the homeowners need water. Copper rain chains carry water off the pergola roof. They do the work of a downspout without putting one on the most visible face of the structure, and they repeat the copper of both roofs. As the trees fill out, the copper darkens and the yews thicken, the garden will settle further into the house it was designed for.
 ,
 ,
In Part Three, we go to the front of the house, where the brick from the backyard became a new walk and a continuous path now leads from the street to the garden.


FREQUENTLY ASKED QUESTIONS
How do you design an outdoor living space on a small historic lot?
Design a small historic lot around how the property needs to work rather than trying to force it flat. On a 28-foot-wide lot at an 1889 house, Studio Olio organized the garden across three grades, with a covered patio, an upper garden and shed, and a side courtyard joined by a ramp. The same plan solved privacy, drainage, storage and daily routes for bins and equipment.
Why use a ramp instead of stairs in a garden?
A ramp lets wheeled equipment move between levels and makes a grade change easier for everyone to cross. On one historic property, the homeowners move larger items to their shed on a dolly, so I designed a ramp leading to a shed entrance set on grade. A ramp also makes a garden more usable for someone with a walker, cane or wheelchair. It can support aging in place at little additional cost when it’s planned from the start.
How do you improve drainage in an old backyard?
Find out why the existing drain is failing before replacing it. At one 1889 house, the old drain was flexible corrugated pipe with no gravel bed or filter fabric, and it sloped down, then up, then down again. We replaced it with a drainage system using rigid pipe, a gravel surround, filter fabric and a continuous fall toward the outlet. Along Colorado’s Front Range, many properties also have clayey, compacted soils that can drain poorly, although soil conditions vary considerably from one site to another.
How can you make a garden more drought tolerant?
Start by understanding the soil rather than assuming what it needs. A soil jar test can help show the proportions of sand, silt and clay and the amount of organic matter present. Along Colorado’s Front Range, many soils are clayey, while other properties have very different conditions, so the solution depends on the site. In one sandy garden, I replaced approximately 18 inches of soil in the beds with a 50/50 soil-and-compost blend and mulched heavily to help retain moisture.
Is mature landscaping worth the additional cost?
Mature plants can be worth the cost when they have a job to do immediately, such as providing privacy. For a covered pergola on a narrow historic lot, smaller evergreens would have taken years to screen the neighbours, so I sourced mature yews from out of state. They cost more to buy and ship, but they gave the homeowners privacy from the first day. In Denver, screening plants also need to be selected for the property’s particular sun, soil, exposure and water conditions.
What materials work well for outdoor structures at a historic home?
Choose materials that suit the architecture, climate and expected lifespan of the structure. For a pergola and shed at an 1889 house, Studio Olio specified cedar for its outdoor durability and resistance to rot and insects. Standing-seam copper roofs tied the two structures together and will develop a natural patina as they age. In Denver, intense sunlight, dry conditions and large temperature swings make durability and long-term maintenance important considerations when selecting exterior materials.
How do you build a garden on a historic lot with limited access?
Plan the construction route along with the design. On one project, the only way into the backyard was a 27-inch passage beside the house, so no machinery could reach the garden. The structures, brick, soil and plants all had to come through by hand, including mature yews weighing hundreds of pounds. On any historic property, existing garages, fences, trees, narrow side yards and other site conditions should be considered before construction begins.
Project Journal
Every historic renovation has a story. The story of this 1889 Victorian unfolds across three journal entries:
Indoor-Outdoor Living in a Historic Home
How an old house gained a garden that works as a room of the house.
Building an Outdoor Living Space for a Historic Home (Current Article)
Tree roots, a failed drain, three grades and 300-pound yews through a 27-inch passage.
Restoring the Front Entry of a Historic Home
Salvaged brick, a gate that finally swings the right way, and a replica front door.
→ View the Victorian Indoor Outdoor Project for the complete project overview
