
The Build: What It Actually Takes to Renovate a 1911 Kitchen
There is a version of a kitchen renovation that exists in renderings — clean lines, finishes selected, everything in its place. And then there is the version that exists before that one, where the walls are open and the floors are covered in a century’s worth of decisions that have to be undone before anything new can begin.
This is that post.
The dust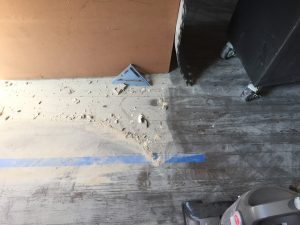
The wood paneling came off first, then the plaster and lath walls. Plaster dust is some of the finest particulate you will ever encounter in a renovation — it travels. It doesn’t stay in the room you’re working in. It finds its way into every other room, settles on every surface, and coats everything in a layer that feels almost silky until you realize it’s been three days and it’s still there.
The drywallers came in after demo. Drywall sanding dust is similarly fine, though it doesn’t travel quite as aggressively. And then came the floors.
Floor sanding dust is in a category of its own. It lands on exposed skin and pulls the moisture out of it. Face masks needed to be changed nearly every hour. A shop vac handles what it can, but the dust wins most of the time. Anyone who tells you a renovation is clean has never opened up a 110-year-old house.
What was inside the walls
Once the walls were open, the first thing that became visible was knob and tube wiring — the original electrical system, still in place throughout the house. It had been spliced into both aluminum wire and copper romex, which is among the more hazardous combinations you can find in an old home. The decision was straightforward: full rewire, the entire house, not just the kitchen.
 The electricians were in the house for three weeks on the rough-in alone. Some of the kitchen wiring had to wait until after the cabinets were installed.
The HVAC was a separate project entirely. This house got a full mini-split system — individual head units in each room, fed by copper line sets running from outdoor condensing units. Installing line sets through a 1911 house means feeding two insulated copper pipes, an electrical wire, and a condensate drain line through walls built with old-growth lumber used as studs — dense, massive, and not interested in cooperating. Eight line sets total, four running through the kitchen walls.
My dad came down to help run them — four of us working simultaneously across three floors, my husband in
 the crawlspace feeding lines up through the floor, our neighbour on the second floor passing them up, and my dad pulling them into the attic while I worked the main floor. We spent most of the time shouting to each other through walls thick enough to swallow the sound.
Here is a short video of me feeding a line set through a wall. It was three seconds long, but I slowed it down to show 10 seconds.

There was also a happy surprise. When the walls opened up above the fireplace mantel, the original brick was there — intact, just waiting. It stayed exposed. It’s still there.
The floors
The floors are original heart pine — old-growth, dense, narrow-grained, the kind of wood that doesn’t exist in new construction anymore. They were also cupped, which is what happens to old wood floors over time as moisture works through them unevenly, and they had adhesive from a previous surface bonded directly to them.
Getting them back meant sanding by hand — my husband, my brother, a neighbour, and me, working through the glue room by room. Heart pine at this age responds differently than newer wood — it has to be read as you go. The result was worth every hour of it. Refinished, the floors became the anchor of the room.
The trim
When the original trim came off during demo, most of it came apart in pieces. Some was salvageable. Most wasn’t. The millwork in this house — the entryway, the living room, the study — is part of what makes it what it is, and matching it convincingly matters.
A specialty wood shop had a knife profile already cut that was close enough to the original that it’s genuinely difficult to tell them apart. The new trim went in alongside what could be saved, and the room reads as continuous. That’s the goal — not perfect preservation, but seamless integration.


The finishes
The cabinet color went through its own process. White cabinets are beautiful in principle — and impractical in a kitchen where two people cook seriously and messes are part of the work. The cabinet makers produced samples based on a reference image, landing on a stain and glaze that reads somewhere between driftwood and warm grey. Neither painted nor natural. A tone that felt like it had always been in the home.
The sink configuration was a 60/40 over a standard 50/50 — larger and deeper on the main side, sized to lay a full plate flat. For a kitchen where preserving is part of the work, that matters.
 The granite slab was selected in person at the supplier, which is the only way to choose stone. A slab that reads as grey and white in a sample board has movement and depth in full scale — it shifts with the light. In a kitchen with three bay windows, that’s not a small thing. The right slab was identifiable the moment I saw it. I called the supplier from the cabinet maker’s studio and asked her to hold it.
I made the floating shelves from raw ash slab — cut, sanded through multiple grits, sealed, and installed on hidden brackets myself. The kind of detail that reads as simple once it’s done, and is anything but.
Studio Olio specializes in historic home renovation in Denver and remotely. If you’re planning a kitchen renovation and want to understand what’s possible — start with a complimentary discovery call.
→ Next: The Finished Kitchen: A 1911 Folk Victorian
← Previous: The Layout: Five Openings, a Fireplace, and How a Room Tells You What It Needs
Frequently Asked Questions
What should you do if you find knob and tube wiring during a historic home renovation?
It depends on the condition. Knob and tube that is unspliced and has intact insulation can, in some circumstances, be left in place — it’s the modifications that make it dangerous. In this house, the wiring had been spliced into both aluminum wire and copper romex, which is among the more hazardous combinations you can find in an old home. That made the decision straightforward: full house rewire, not just the kitchen. If the walls are already open and the wiring has been compromised, there’s no good argument for leaving it.
Can original hardwood floors be saved if they have glue or adhesive on them?
Usually yes, though it takes more work than a standard refinish. Old-growth hardwoods like heart pine are dense enough to sand through most adhesives, but cupping and uneven surfaces require reading the floor as you go rather than running a drum sander straight through. The result is nearly always worth the effort.
How do you match original trim in a historic home renovation?
Find a specialty millwork shop that can match the profile. Most historic trim was cut with specific knife profiles that a good shop can replicate from a sample of the original — or from a measurement if the original is too damaged. The goal is seamless integration, not a perfect copy of something that no longer exists.
How do you manage dust during a historic home renovation?
You manage it, but you don’t eliminate it. Plaster, drywall, and floor sanding each produce different dust with different behavior — plaster travels the farthest, floor sanding is the most physically demanding to work through. An air scrubber is worth having on site — unlike a regular fan, it pulls particulates through a HEPA filter rather than just redistributing them. Containment helps. A shop vac helps. Changing your face mask regularly helps. Accepting that everything will be coated in something fine and gritty for the duration of the project helps most of all.
