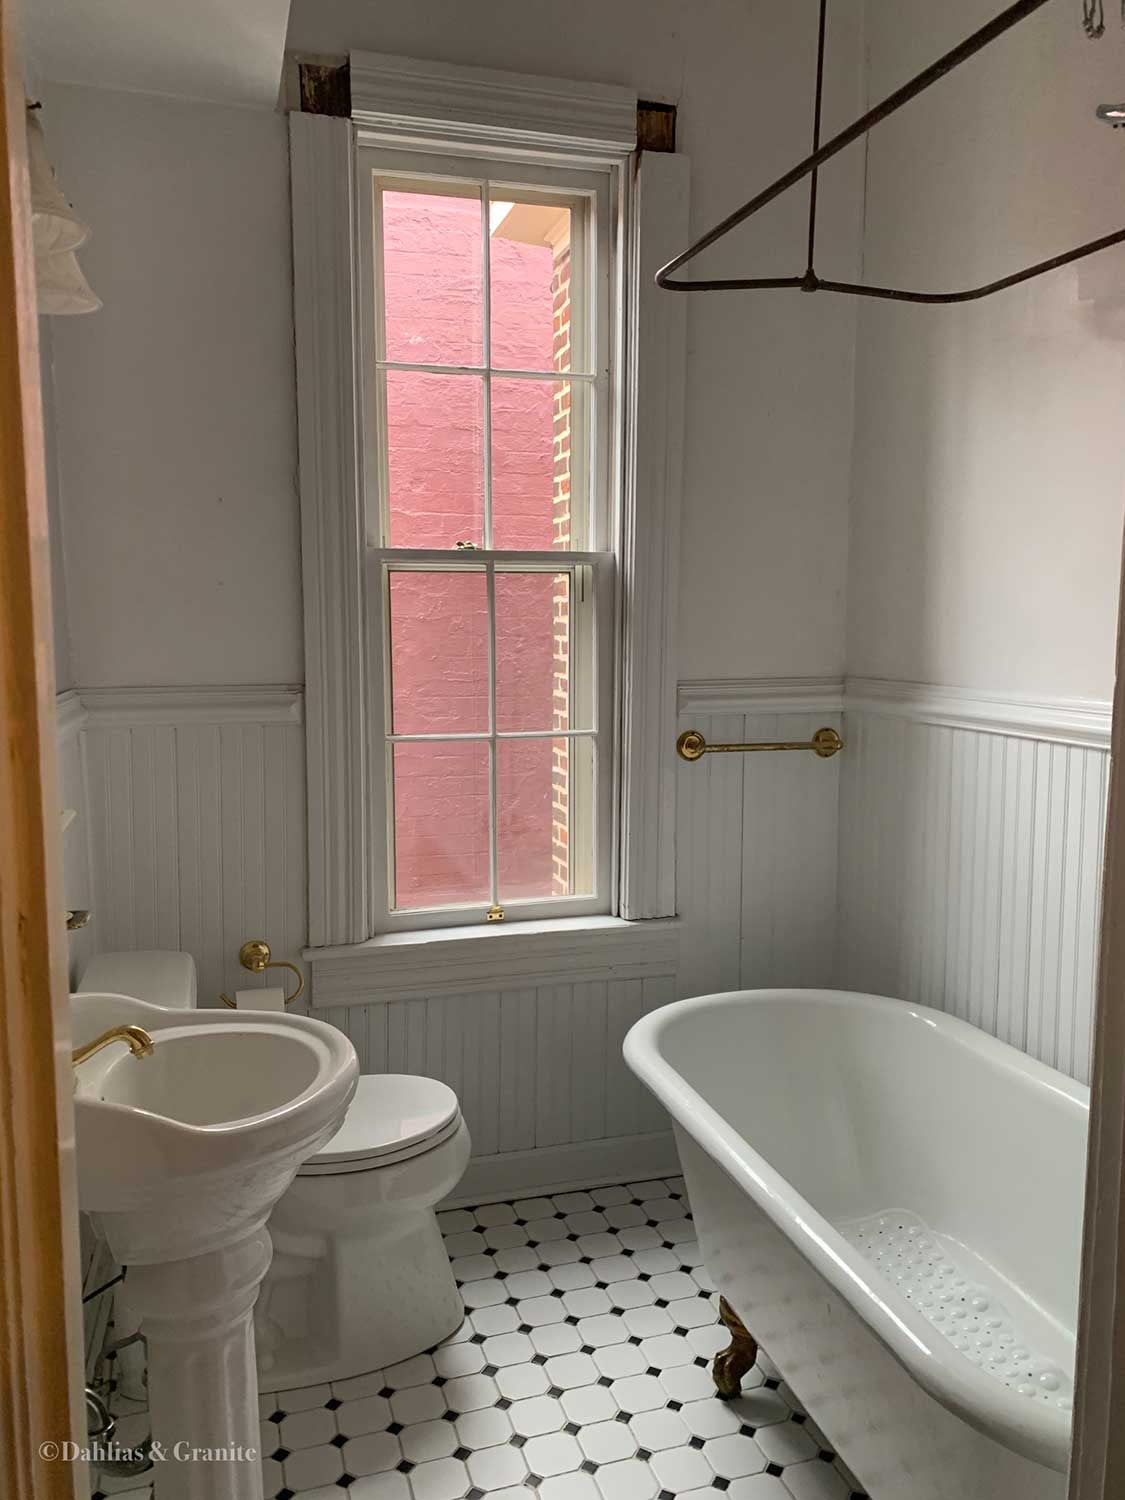
If you read Part 1, you know what this bathroom became. What you don’t know is what it took to get there.
This is the part that doesn’t make the reveal photos — the decisions, the pivots, the trades that are harder and harder to find, and the work that happened before a single tile went up. If you’re planning a historic bathroom renovation, this is the post you actually need to read.
Historic bathrooms present challenges that simply don’t exist in newer homes. Original plaster, aging plumbing, specialty trades, custom millwork, and preservation decisions all affect how the project unfolds. While every house is different, this 1889 Victorian illustrates many of the decisions homeowners face when restoring a late nineteenth-century bathroom. It’s one reason I love working on historic homes—every renovation teaches you something new while asking you to respect what came before.
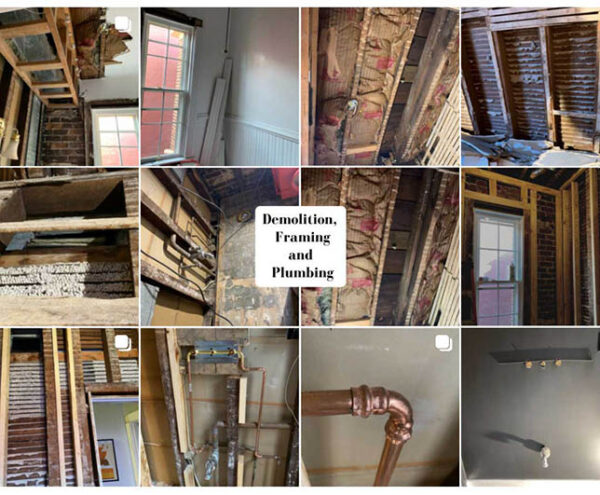
What We Found Behind the Walls
When you gut a bathroom in a house this age, you’re making a bet. Sometimes the walls are fine. Sometimes they’re not.
In this case, the mold we’d seen on the surface had stayed on the surface. The studs were clean. That was the good news.
The question then became: do we replaster, or do we drywall?
In a historic home, replastering is always the more sympathetic choice—it matches the original construction, it’s more dimensionally stable, and done well, it’s beautiful. The problem is finding someone who can do it well. We’d had two difficult experiences with plasterers by this point, and that’s not an isolated story. The old world trades are disappearing. Plastering, in particular—real lime plaster, done properly—is a skill that’s becoming genuinely difficult to source. It’s a loss worth naming.
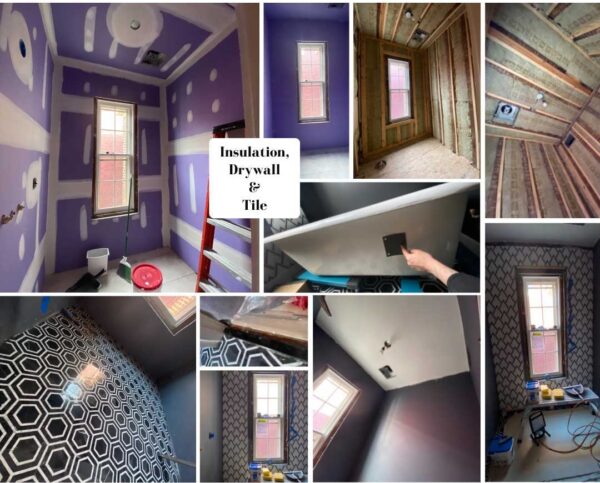
We made the call to go with moisture-resistant drywall instead. Purple board, which is the right specification for a wet room. In a full gut bathroom it’s a defensible choice—better moisture performance than standard drywall, and in this case, the right one given what we were working with on the trades side. It doesn’t carry the same character as plaster. But it will outlast a bad plaster job by decades.
The Tub Surround
The 1913 cast iron tub left the room early. It went out for refinishing—grey on the exterior, white inside—and while it was gone, we got to work on the surround.
The original brass surround was staying. That was never in question. But we were enlarging it, which meant finding someone who could weld brass cleanly and match what was already there. That’s a shorter list than you’d think. Brass welding is its own skill, and finding a maker who could work at the level this project required took some doing. When you’re restoring a 110-year-old bathroom, the metalwork either holds up to scrutiny or it doesn’t. We found the right person, and it shows.

The Vanity
This is where the room really got solved.
The original bathroom had almost no storage. The new vanity quadrupled it—custom designed and built to fit the room to the inch, which in a 6×6 space is the only way to do it.
The vanity was built by Steve Drake and me—custom designed and built to fit the room exactly, because in a 6×6 space, there’s no other way to do it. Every inch is spoken for before you start.
By wall-mounting the faucet, we returned about six inches of counter space—enough to fit an artist-edition sink instead of something standard. That decision alone changed how the whole vanity reads.
The design went through a real pivot mid-project: it was originally spec’d in oak, and we moved to an opaque stain partway through once we saw how the wood was reading against the tile. The V-shaped mullions on the vanity doors echo the black and white tile pattern on the floor—a detail that ties the whole room together without being obvious about it.
Steve also restored the original door, and his care shows in every detail of it—same as it does in the vanity.

The Order Matters More Than Most People Realize
One of the biggest misconceptions homeowners have is that bathroom renovations happen room by room. In reality, they happen system by system, and the sequence matters. In a historic home, getting that order right can prevent costly delays, protect original materials, and keep the project moving.
For this renovation, the work followed a carefully planned progression:
- Complete demolition
- HVAC modifications
- Plumbing rough-in
- Electrical rough-in
- Moisture-resistant drywall
- Priming
- Tile installation
- Crown molding
- Paint
- Reinstalling the refinished cast iron tub
- Plumbing fixtures
- Final trim and punch list
We also installed a marble threshold at the bathroom entrance. While it’s a traditional detail in Victorian homes, it serves an important practical purpose by helping contain water inside the room and protecting the original hardwood flooring beyond the doorway.
One detail says more about how we approach renovations than anything else on this project: we removed and reinstalled the toilet twice during construction so the homeowners always had a functioning bathroom while the rest of the room was under construction.
It isn’t glamorous, but thoughtful sequencing like this can make living through a renovation significantly less stressful.
The Decisions That Didn’t Make the Photos
A freestanding tub against a window looks effortless in photographs and is anything but in practice—that gap between the tub and the sill is nearly impossible to keep clean. We talked about it and chose not to do it. The tub stayed where it was. The decision came down to how the room would actually live, not how it would photograph.
The light fixture was the client’s choice, and they love it. While I might have chosen something different, great residential design isn’t about imposing a signature style. It’s about helping homeowners create spaces that feel authentically theirs, and this bathroom does exactly that.
Standard sizing doesn’t work in a room this small. Everything has to be accounted for—the plumbing, the trades, the sequence, the six inches you fight to get back. That’s the real story behind a 36-square-foot bathroom that finally works.
If you’re researching Victorian bathroom ideas, planning a historic bathroom renovation, or trying to preserve original architectural details, I hope seeing the construction process behind this project helps you make better decisions for your own home.
FREQUENTLY ASKED QUESTIONS
What is the biggest challenge in a historic bathroom renovation?
The biggest challenge is usually what you can’t see before demolition begins. Older homes often have outdated plumbing, electrical systems, damaged plaster, or structural surprises hidden behind the walls. Planning for these unknowns—and working with trades experienced in historic homes—helps keep the renovation on track.
Should you keep plaster walls in a historic bathroom?
If the original plaster is in good condition and you can find a skilled plasterer, preserving it is often the best choice. However, when extensive repairs are needed or qualified craftsmen aren’t available, moisture-resistant drywall can be a practical and durable solution that performs well in modern bathrooms.
How long does a historic bathroom renovation take?
Every project is different, but historic bathroom renovations typically take longer than renovations in newer homes. Custom cabinetry, specialty trades, refinishing original fixtures, and uncovering unexpected conditions can all extend the timeline. Careful planning and sequencing help minimize delays.
Is it worth renovating an original Victorian bathroom instead of replacing it?
In most cases, yes. Preserving original architectural details while improving storage, plumbing, lighting, and functionality allows the bathroom to meet modern needs without losing the character that makes a Victorian home special. Thoughtful renovations often add both long-term value and everyday enjoyment.
Studio Olio specializes in historic home renovation in Denver and remotely. If you’re planning a kitchen renovation and want to understand what’s possible — let’s talk.
Project Journal
Every historic renovation has a story. The story of this 1889 Victorian bathroom renovation unfolds across two journal entries:
Historic Bathroom Design: Restoring an 1889 Victorian Bathroom
Discover the design decisions that transformed a cramped 36-square-foot bathroom while preserving the character of this historic home.
Historic Bathroom Renovation: Behind the Build of an 1889 Victorian (Current Article)
Follow the renovation from demolition to completion, including the custom millwork, restored clawfoot tub, disappearing plaster trades, and the sequencing required to renovate a Victorian bathroom.
→ View the 1889 Victorian Bathroom Project for the complete project overview, before-and-after photos, and finished details.
The People Behind the Work
This project was completed with the help of Steve Drake, who brought the same precision to every job that he brought to everything else in his life — his tools were always where they should be, his vehicle was always clean, and the work he turned out reflected both.
Steve Drake was my collaborator and right hand on this project. The vanity, the door, the crown molding, the paint, the fixtures—most of what you see in these photos passed through his hands. Steve passed away not long after this project wrapped. We were lucky to work together.